Growby’s Zapier integration lets you send WhatsApp media with button template messages triggered by any app, automating your messaging workflows and streamlining customer engagement. Template message is sent as first messages to new customers to avoid getting banned.
Prerequisites:
- You should have a Zapier account to use this feature.
- Your account setup should be complete in Growby platform. To set your account up, please follow the blog Account Setup.
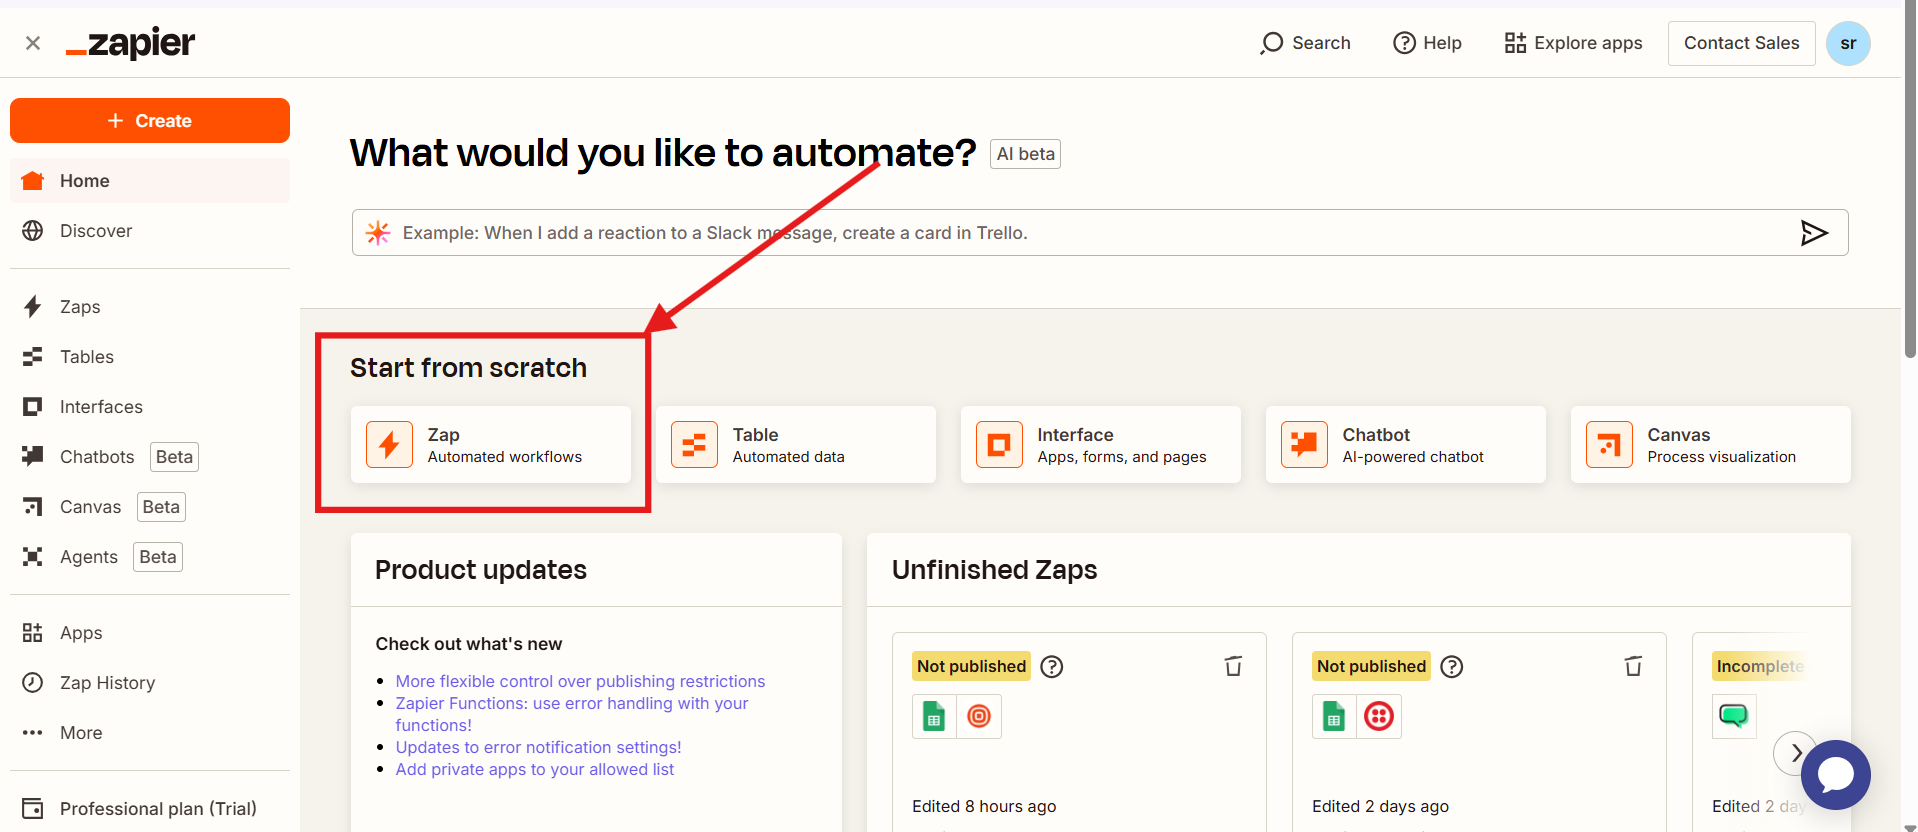
Step 1: Log in to your Zapier Account.
Step 2: Click on Zap to start creating a Zap (A Zap in Zapier is an automated workflow that connects two or more apps to perform specific tasks. It consists of a Trigger and one or more Actions.)
Step 3: Click on Trigger to add your trigger (A Trigger in Zapier is the event that starts a Zap. It’s the condition or action that happens in one app that prompts Zapier to perform actions in another app.)
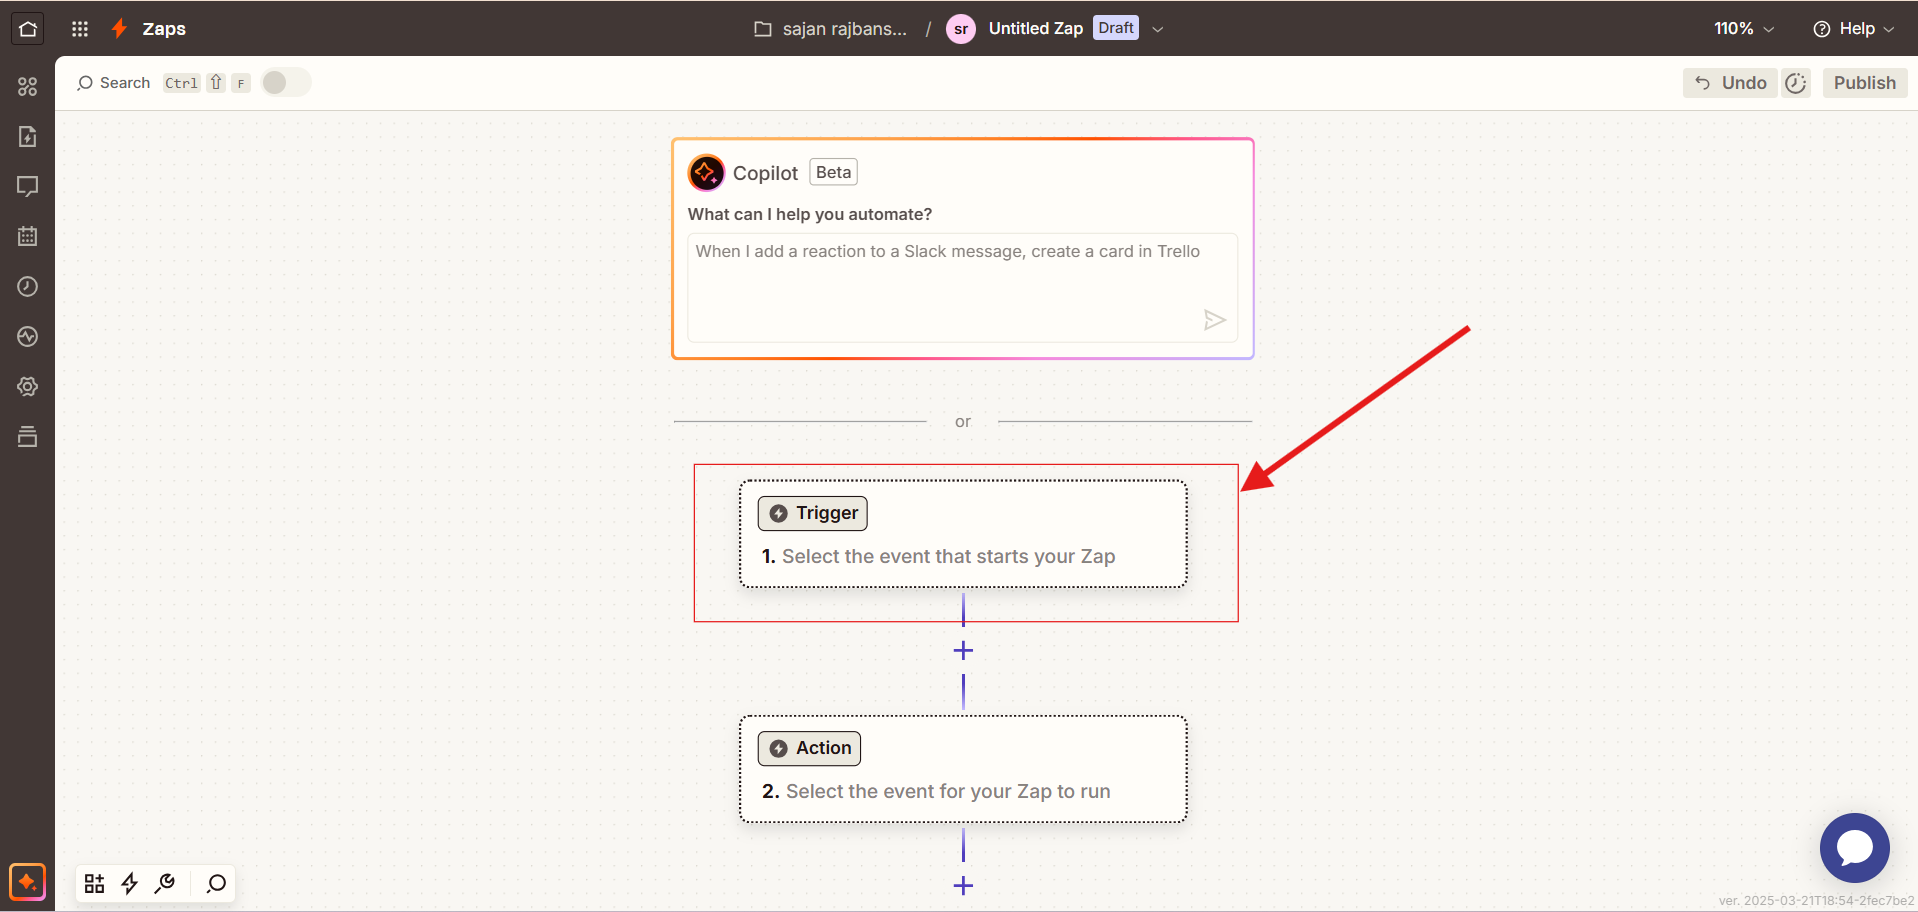
Step 4: Now select and configure the the Zapier application trigger of your requirement. (Please refer to the documentation of the application you are selecting to integrate if required)
Points to remember while doing so.
- The application you choose should return appropriate data that is required to send a message.
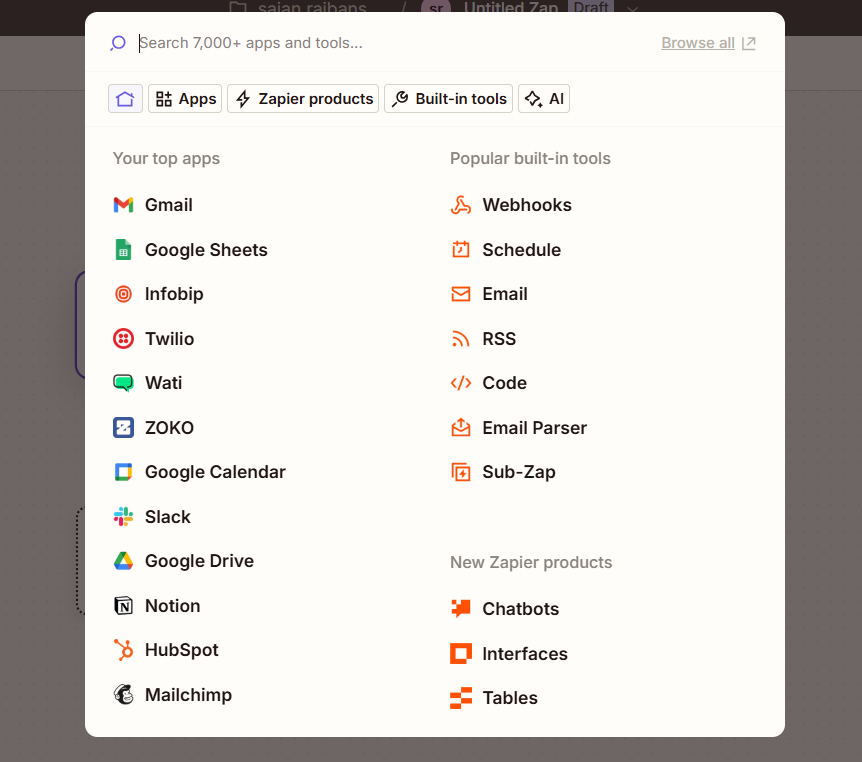
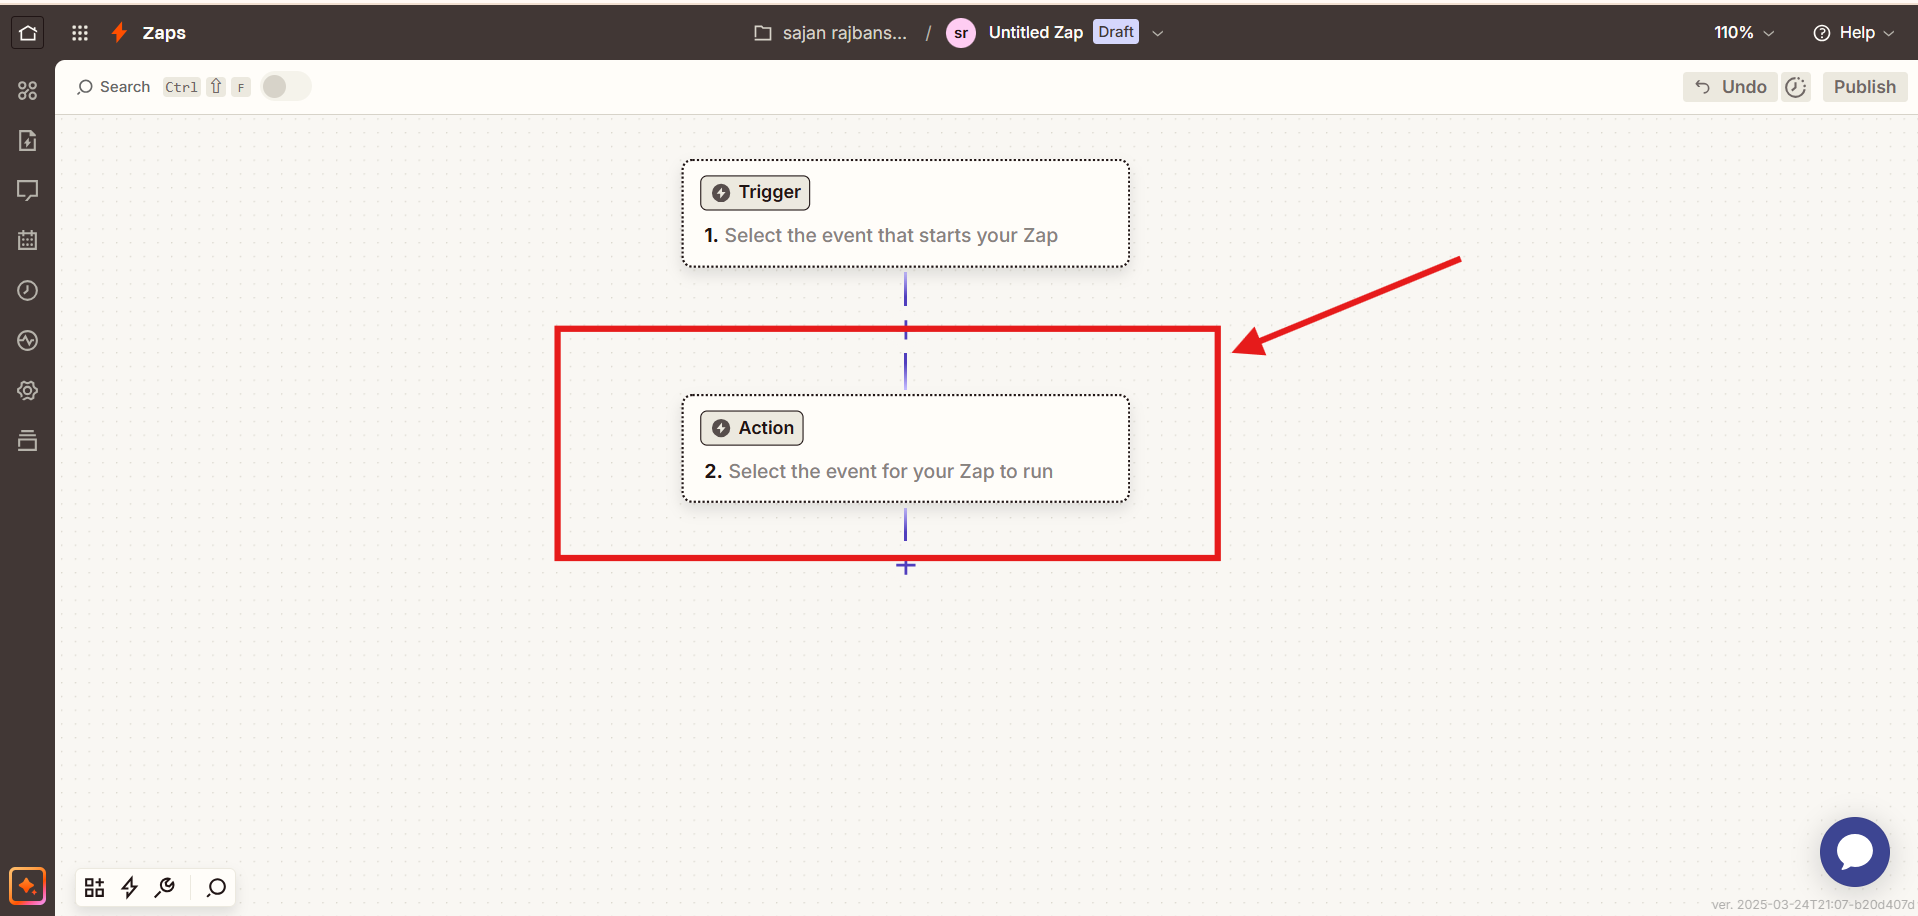
Step 5: Now, Click on “Action“.
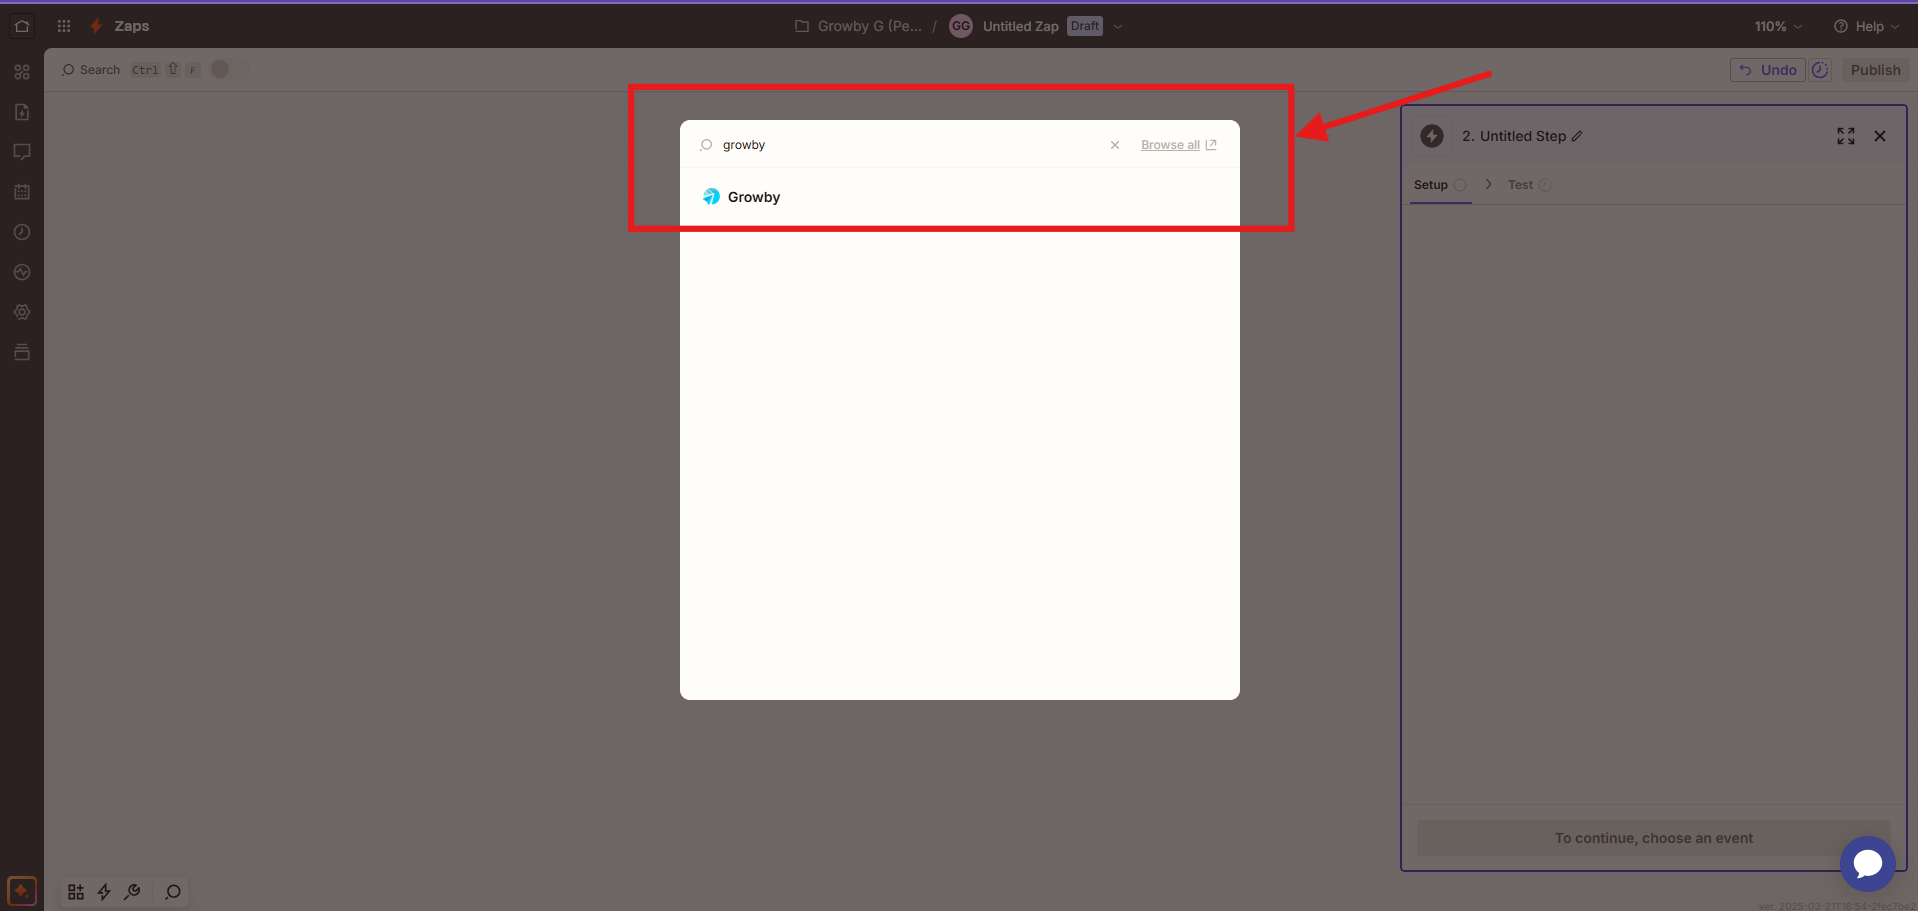
Step 6: Search “Growby” in the search and select “Growby“.
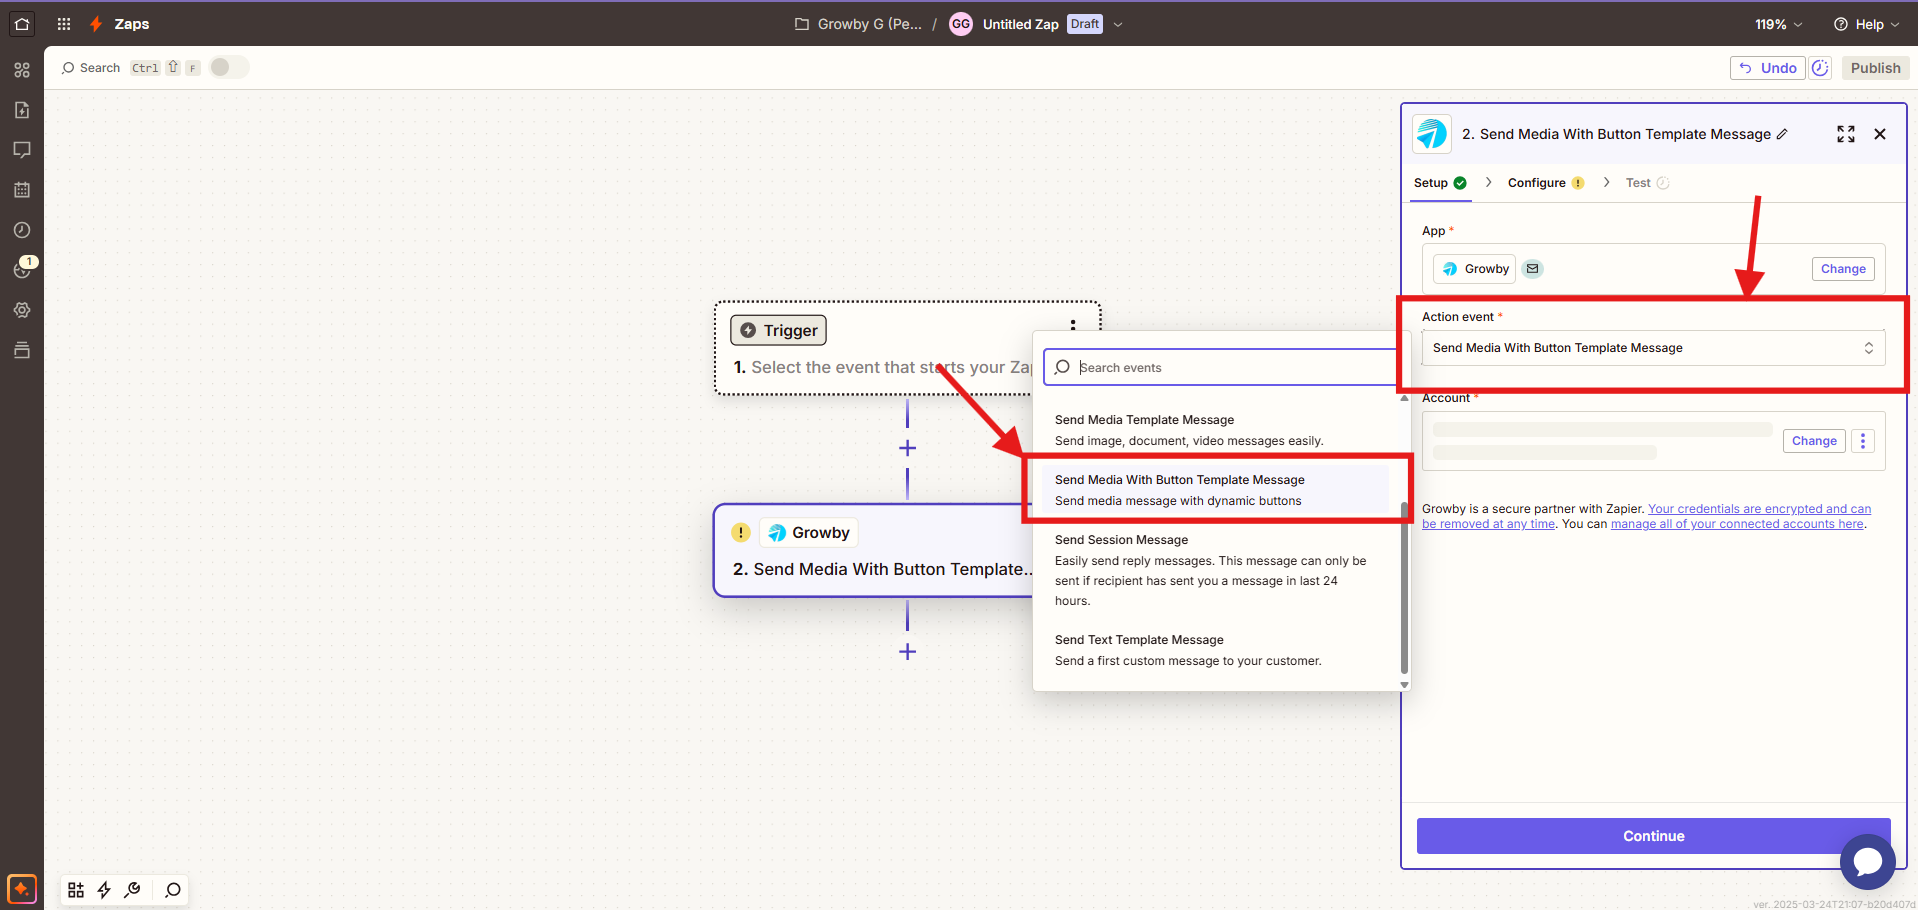
Step 7: Click on “Action event” and select “Send Media With Button Template Message“.
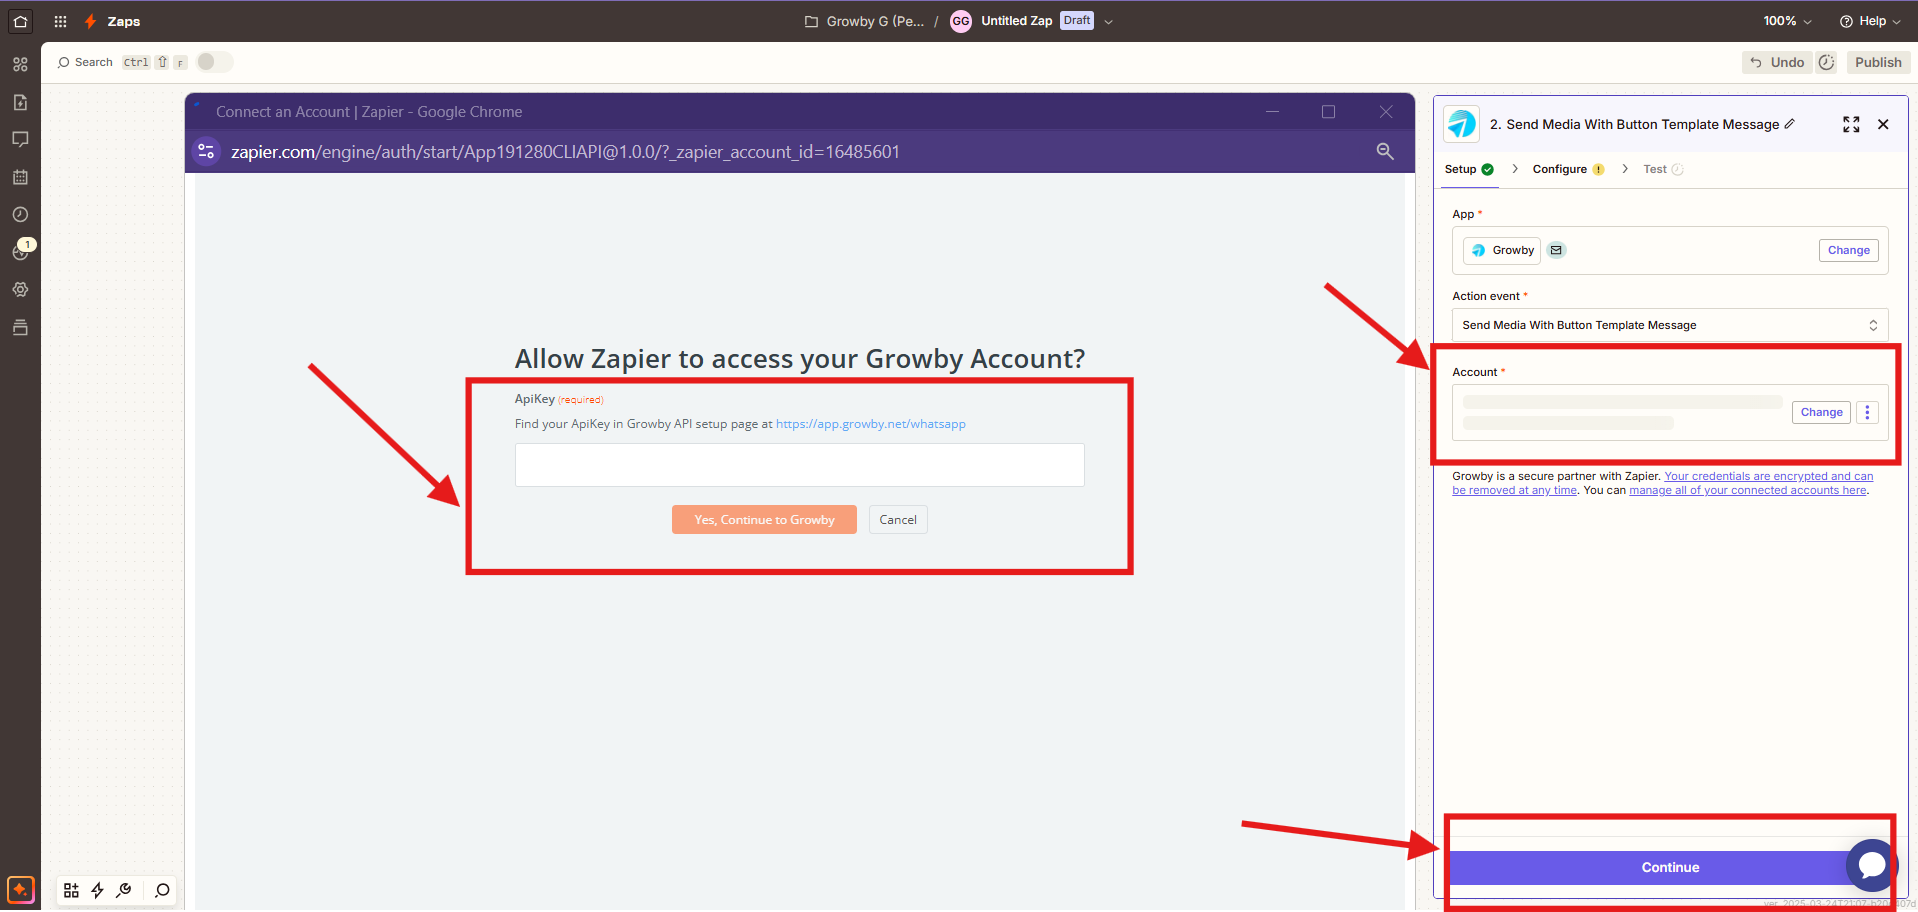
Step 8: Go to API setup page in Growby platform and copy the ApiKey.
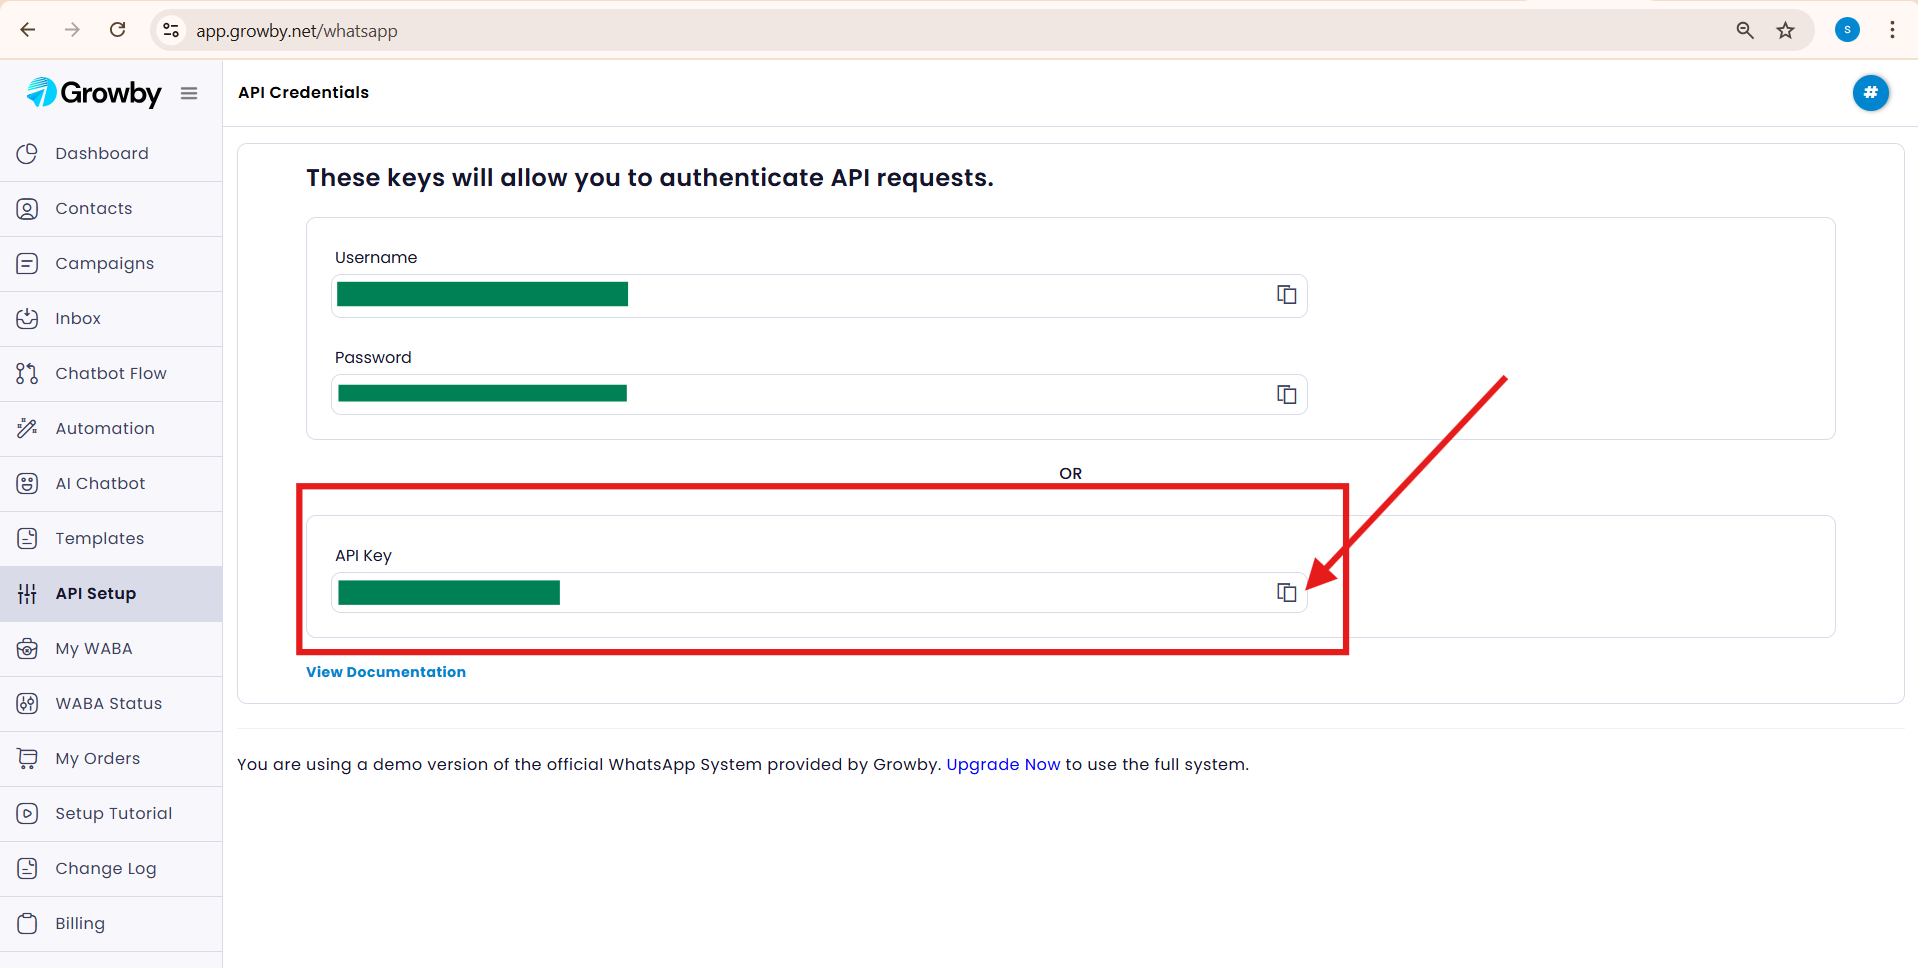
Step 9: Click on account and Paste your ApiKey in the ApiKey text area then click on Continue at the bottom.
Step 10: Now, you need to map or insert the fields as per requirements then click on continue at the bottom.
- Sender Whatsapp Business Number: Your whatsapp business number that you are using in Growby platform or your Whatsapp Business Account Number. (format 91XXXXXXXXXX)
- Recipient Number: The number you are sending the message to. (format 91XXXXXXXXXX)
- Template Name: Name of the template you want to use. (Template you choose here should be approved by meta in your business account).
- Language Code: language code of the language the template is created.
- Media Type: The type of message you want to send. “text”, “image”, “video”, “document”.
- Media URL: The link to the Media URL if the type is “image”, “video” or “document”. (The URL has to be accessible)
- Body Parameters: Parameters of the templates. (If you have multiple parameters, you can add them here, add them in sequential order).
- Button 1 Parameter: If your Dynamic URL button is at index 0, set this field to for the custom parameter of that button or leave empty it otherwise.
- Button 2 Parameter: If your Dynamic URL button is at index 1, set this field to for the custom parameter of that button or leave empty it otherwise.
Remember to pay attention to required fields.

Step 11: Now Click on “Test step“. If the test passes, you can publish by click on the “publish” button at top right corner. If the test fails, check your data mapping in configuration page, make sure you have selected correct format for each field.

Once these steps are done, you have created a Zap automation which will send media with button template message via Growby platform whenever the zap automation is triggered.