In this section, we have attempted to help you with how to create a WhatsApp Template with the help of AI.
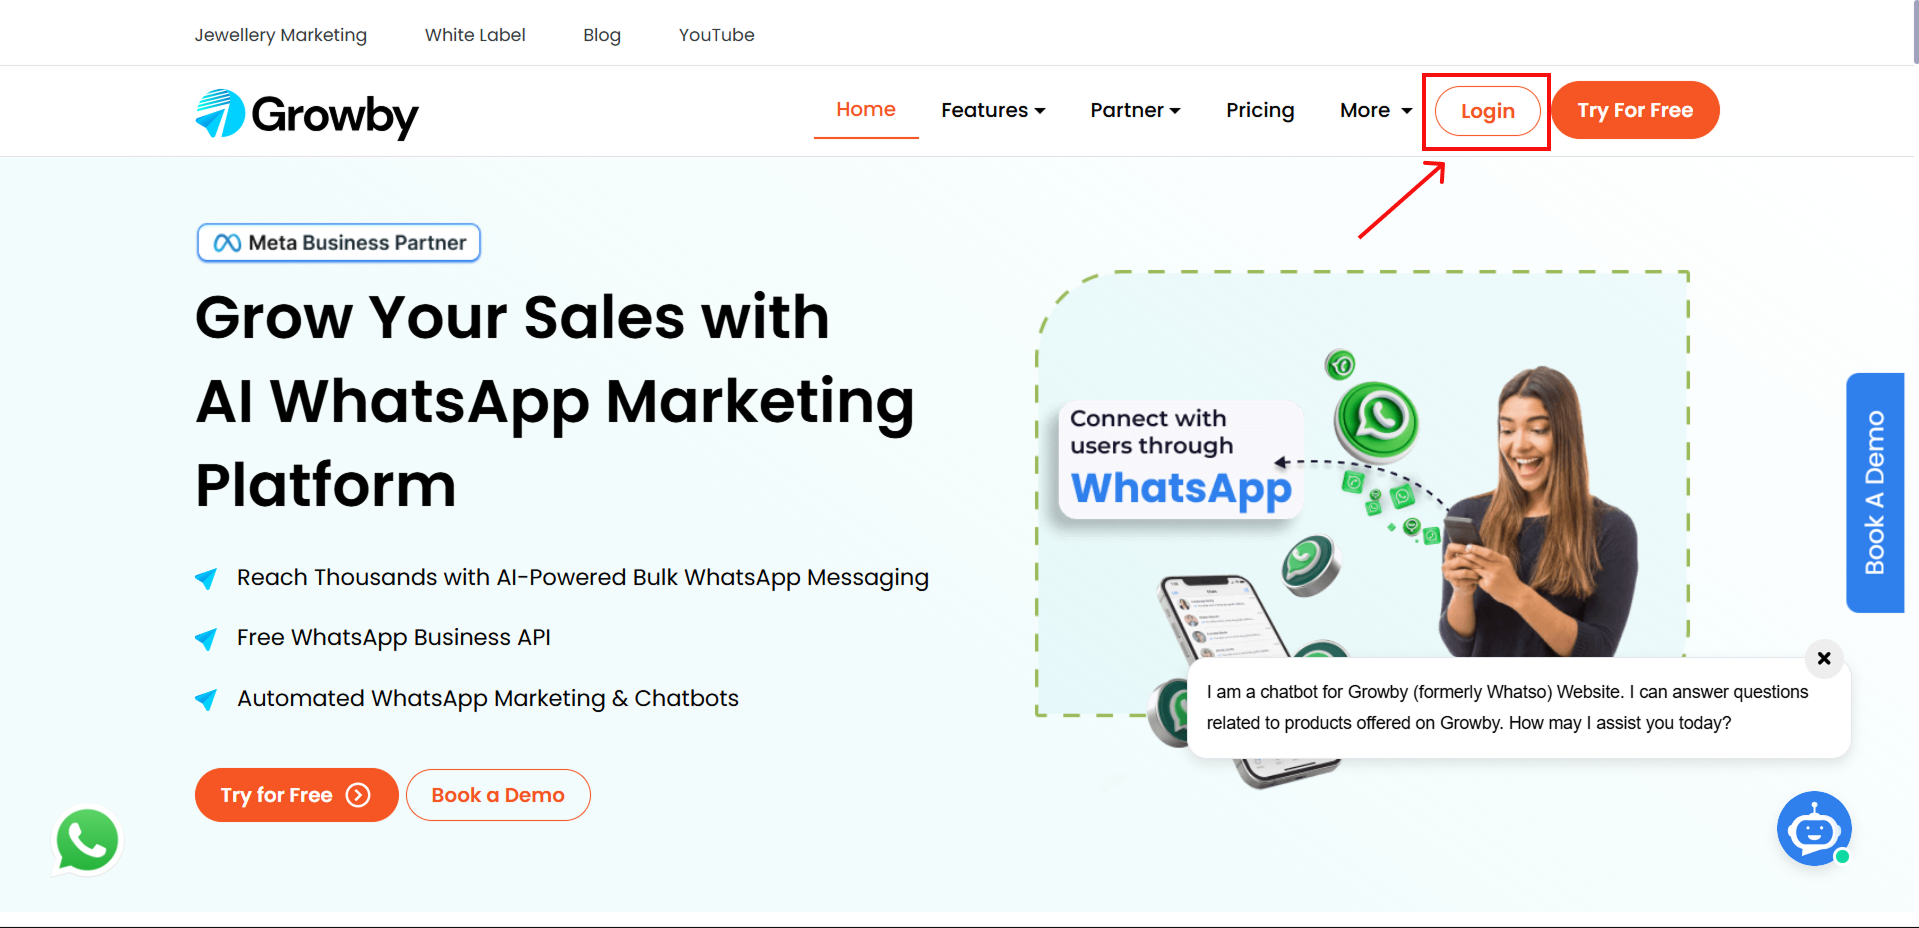
Step 1: Click on Login
To begin, click the Login button located at the top-right of the page.
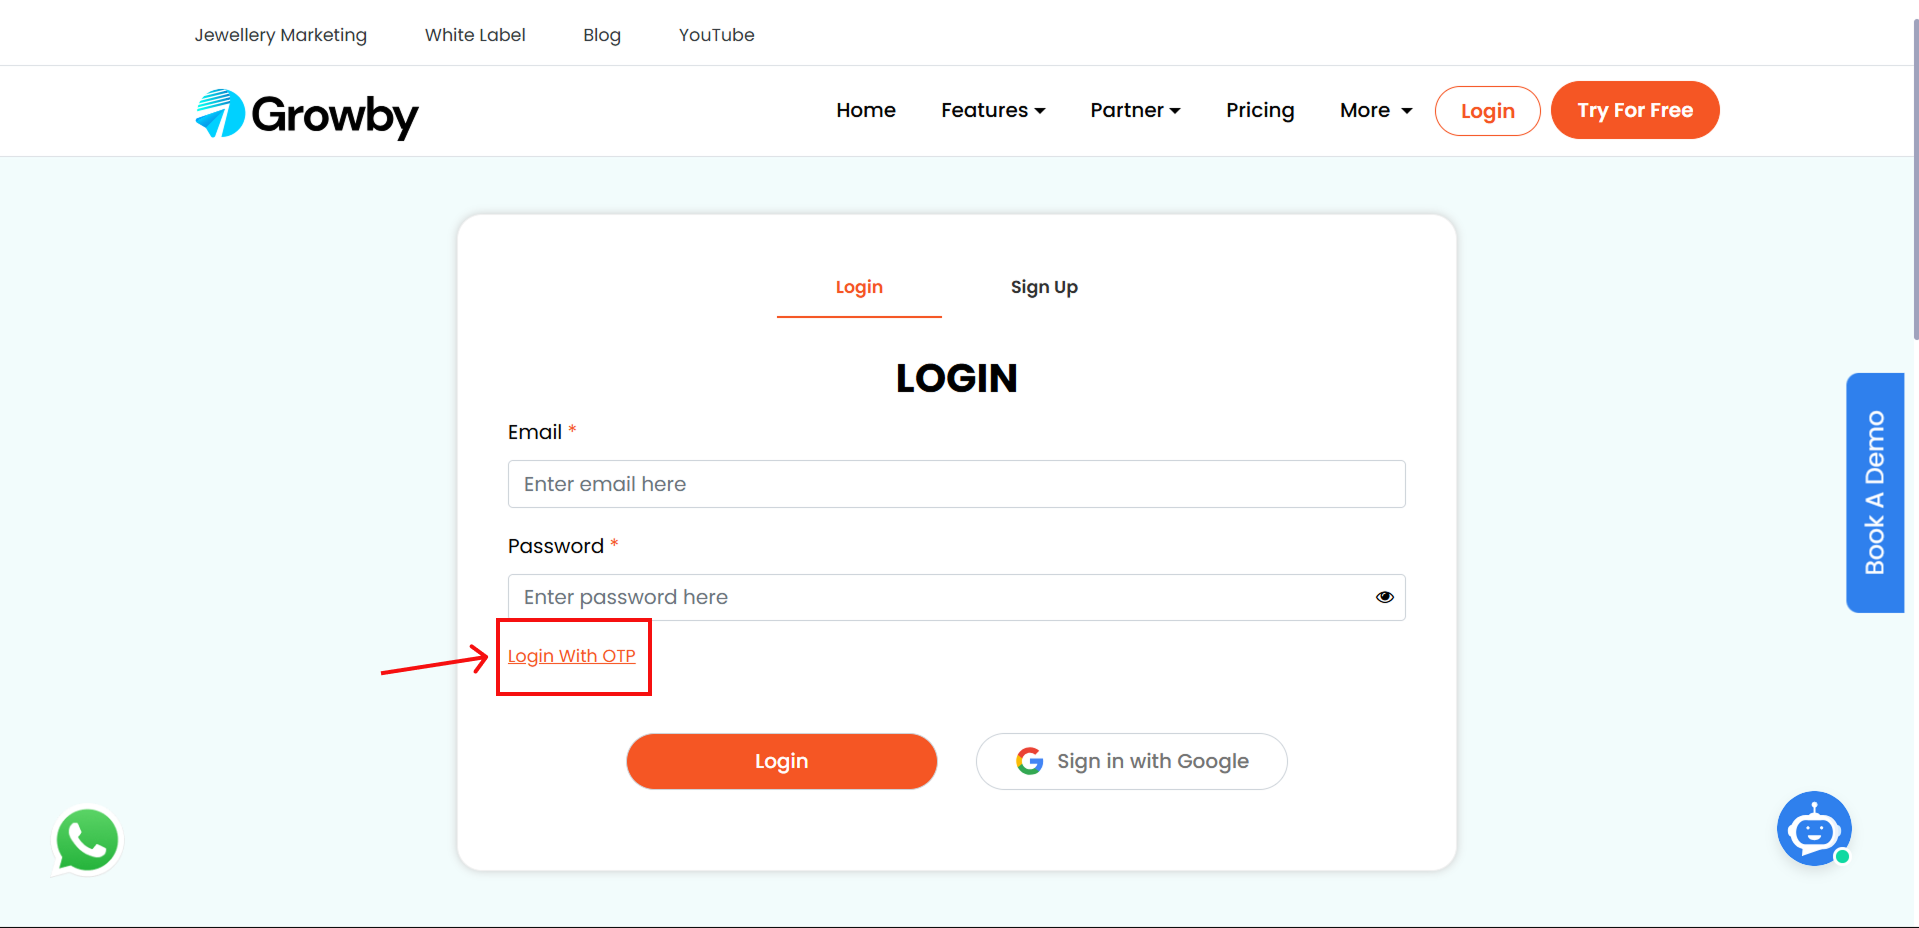
Step 2: Login to your Account
Enter your registered email address and password to sign in.
In case of you’ve forgotten your password then you can sign in to your Account with the OTP by the following steps:
- Click Login with OTP
- Enter the OTP sent to your registered email.
- Click on Login button to login to your Account.
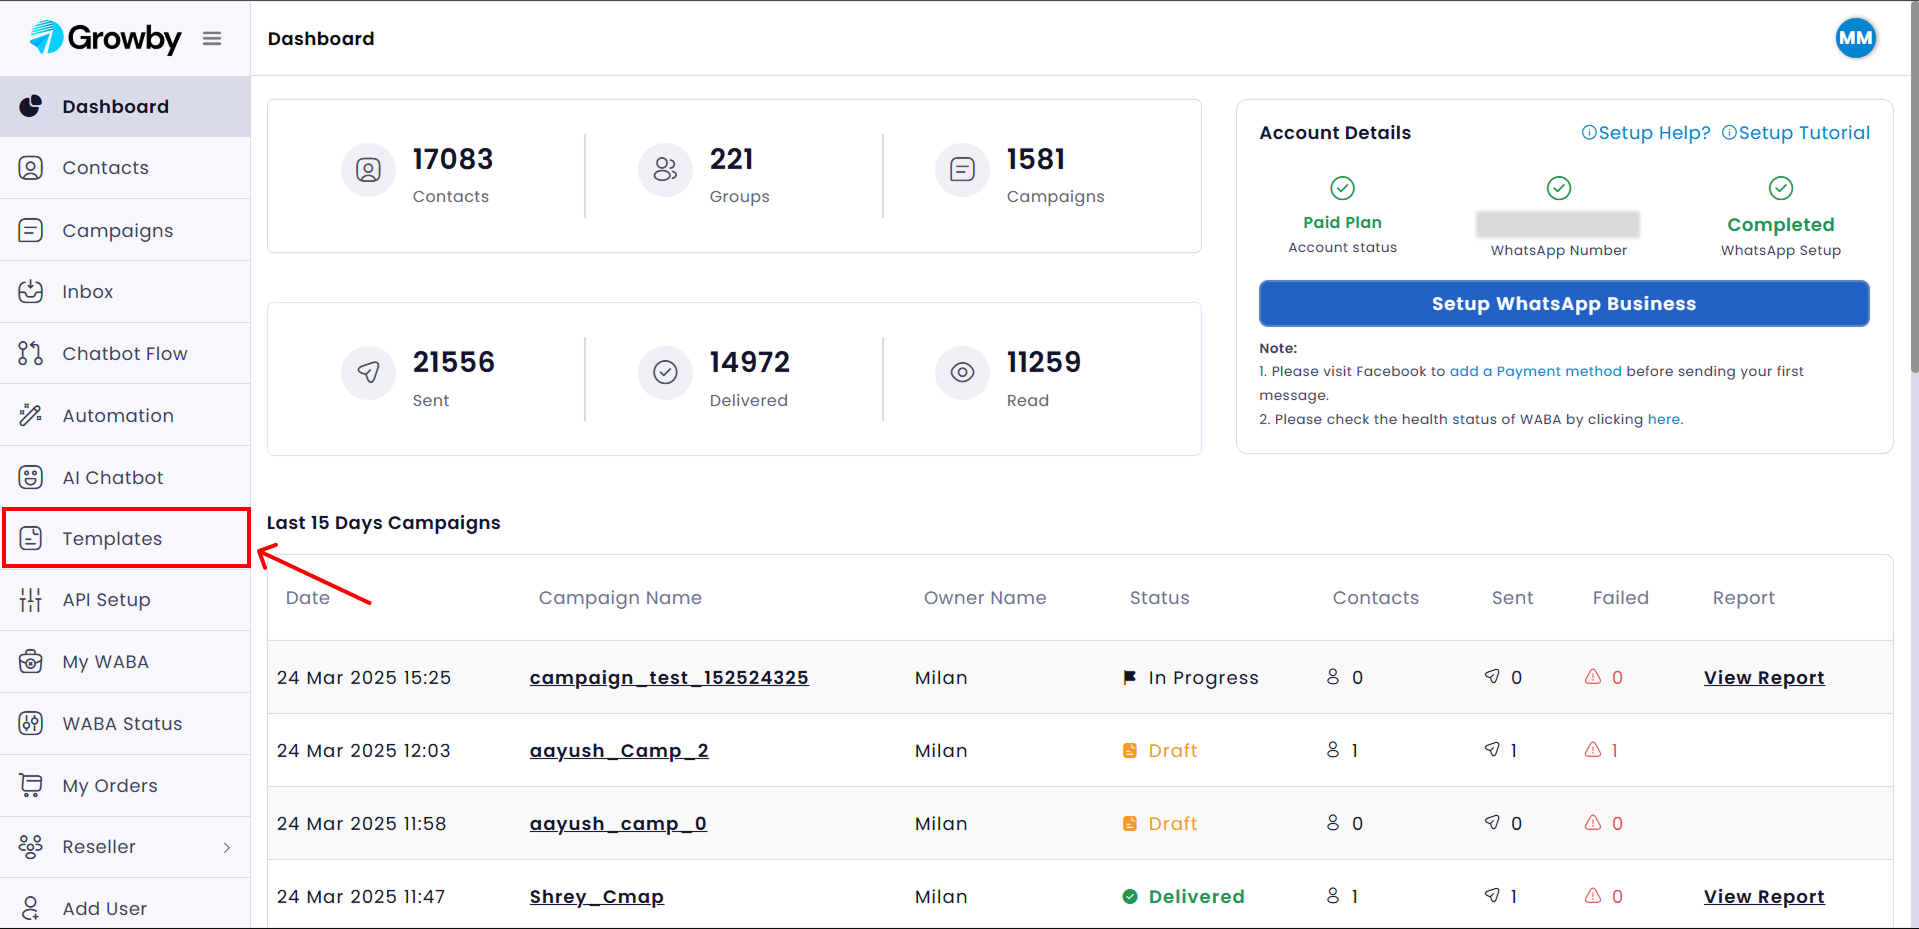
Step 3: Access the Templates Section
Once logged in, you’ll be directed to your Growby Dashboard. Now, click on the Templates tab in the left sidebar.
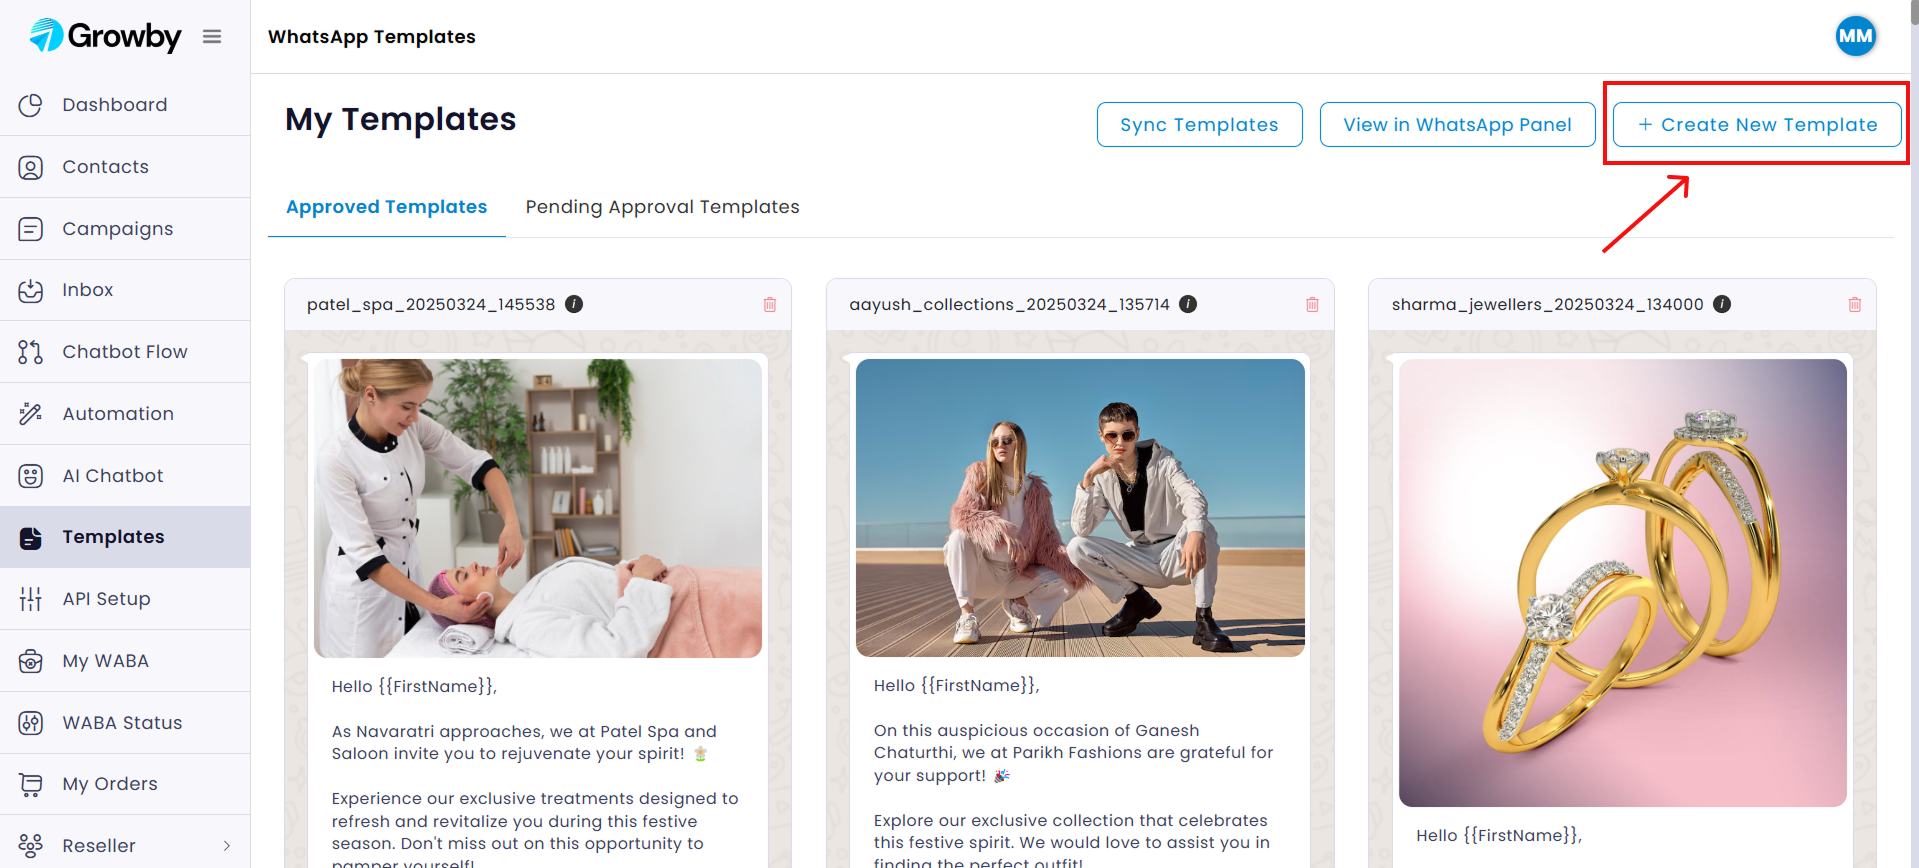
Step 4: Start Creating Your Template
Click the “Create New Template” button located at the top-right corner to begin creating new Template.
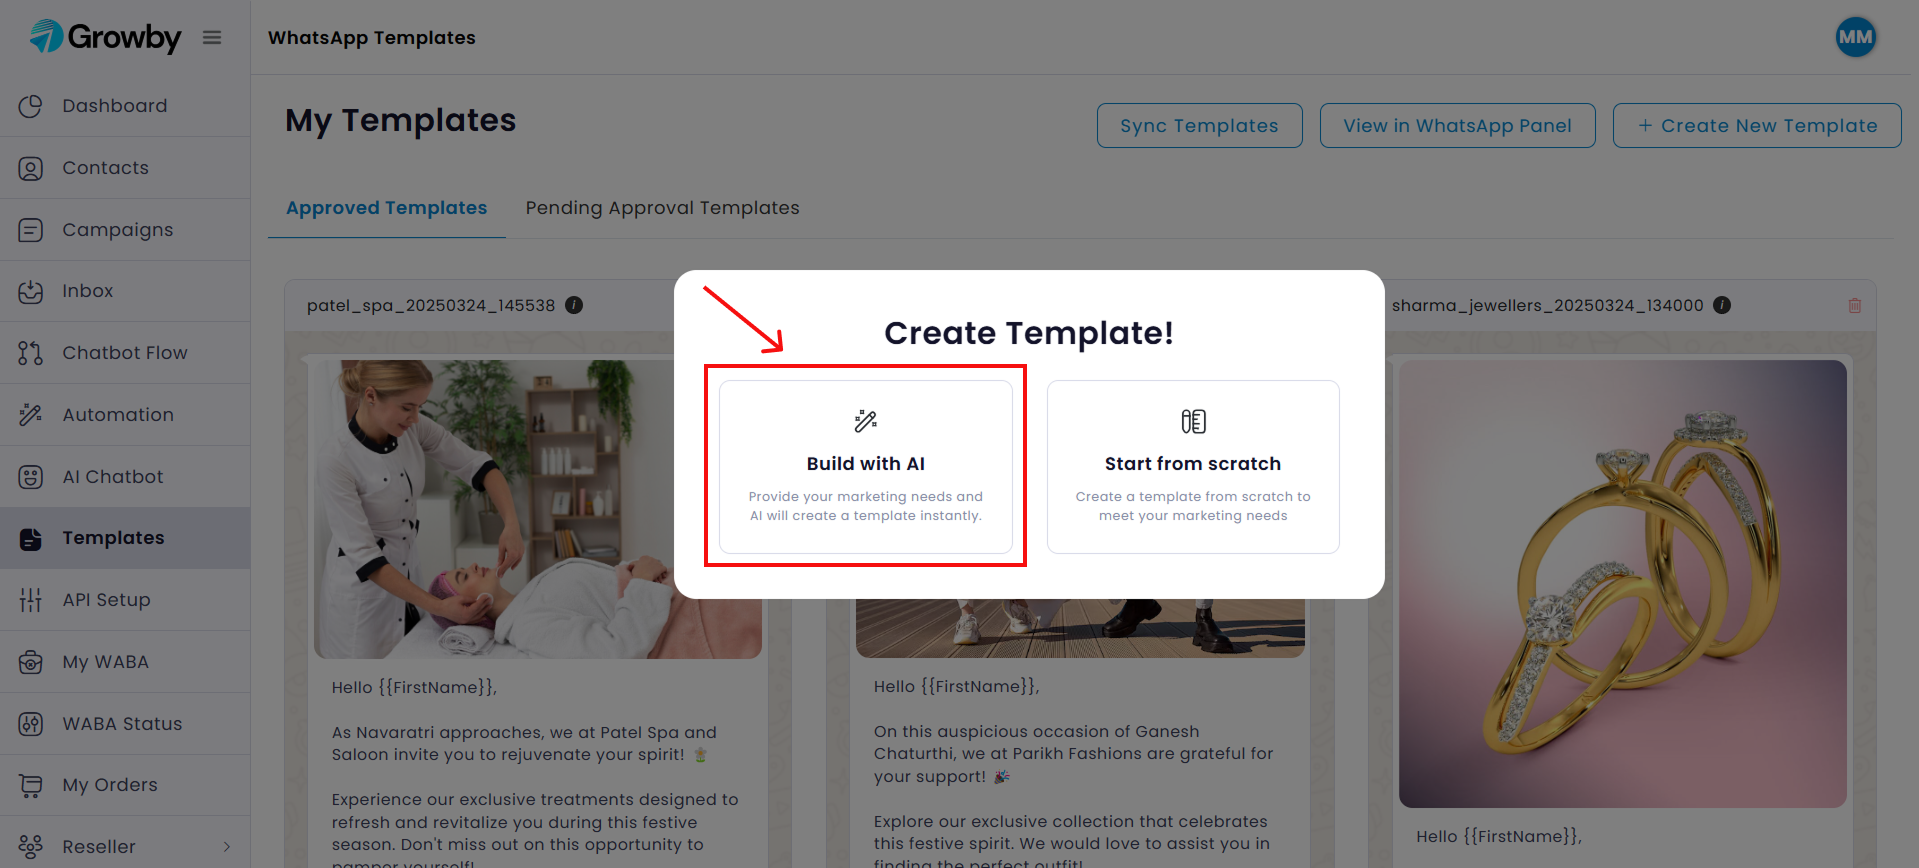
Step 5: Select Build With AI
Click on Build with AI option to generate the Template with the AI.
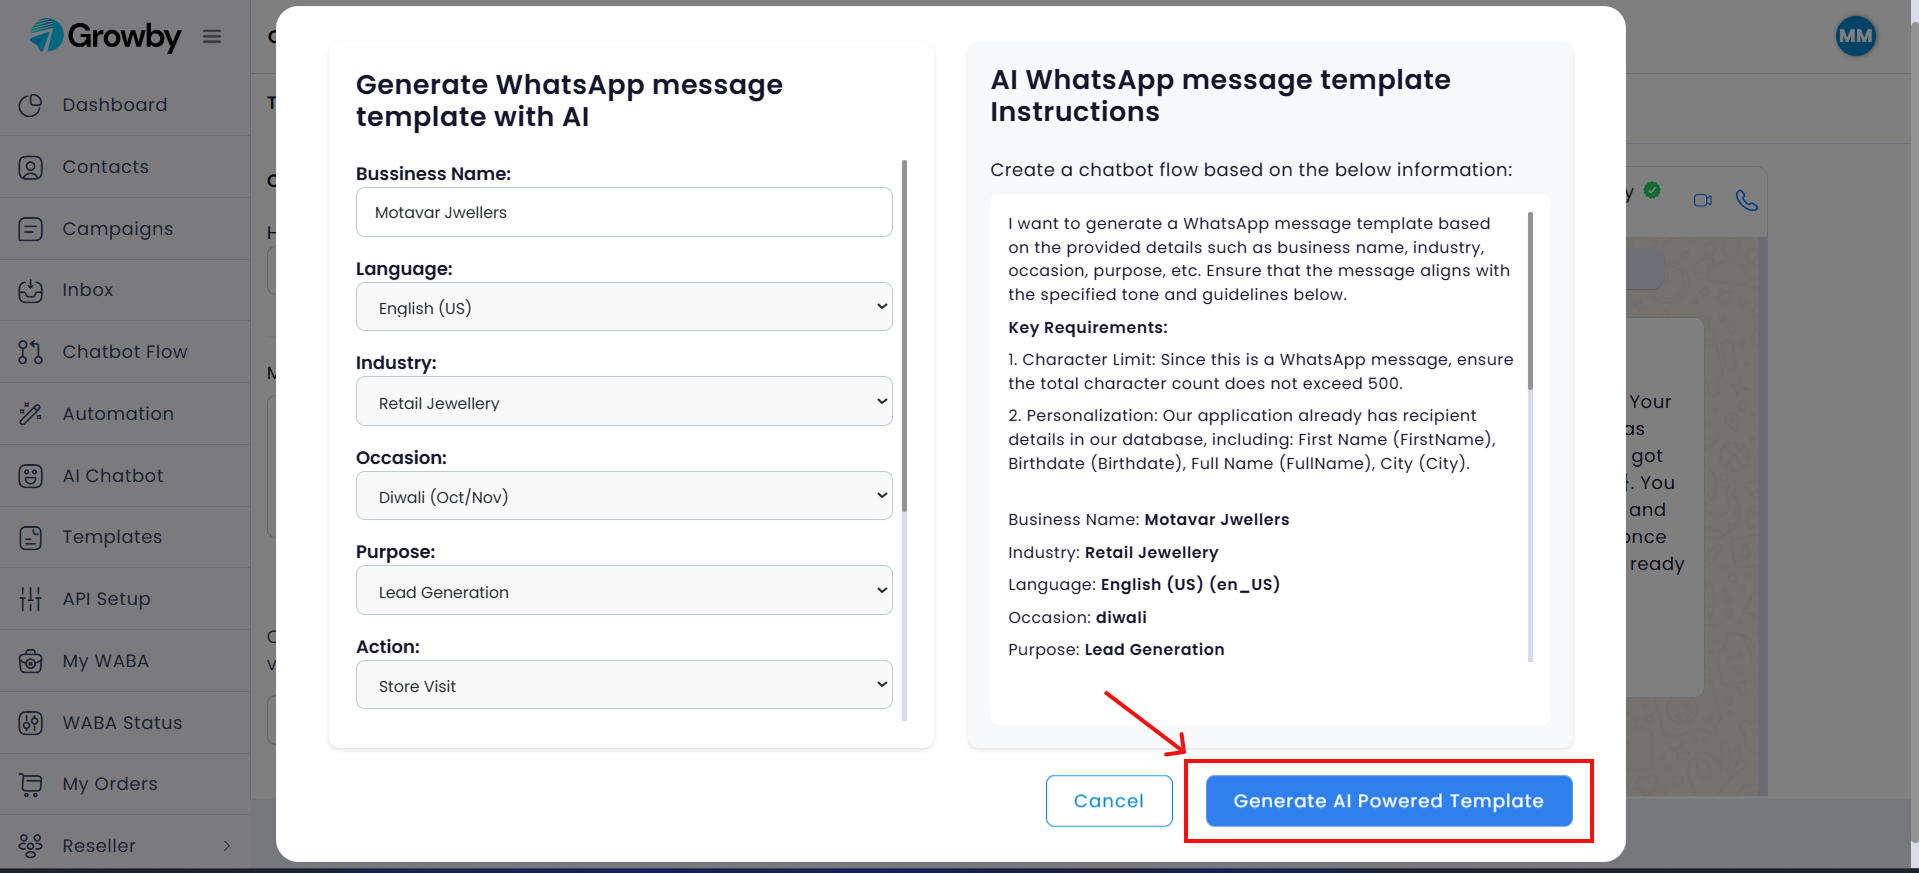
Step 6: Fill The Details In AI Template Form
Fill in the required fields for the template message content. Based on the details you provide, an editable prompt will be generated on the right side. This prompt will serve as the basis for generating your message content.
Once you’ve reviewed the details, click the Generate AI Powered Template button at the bottom to proceed to the next step.
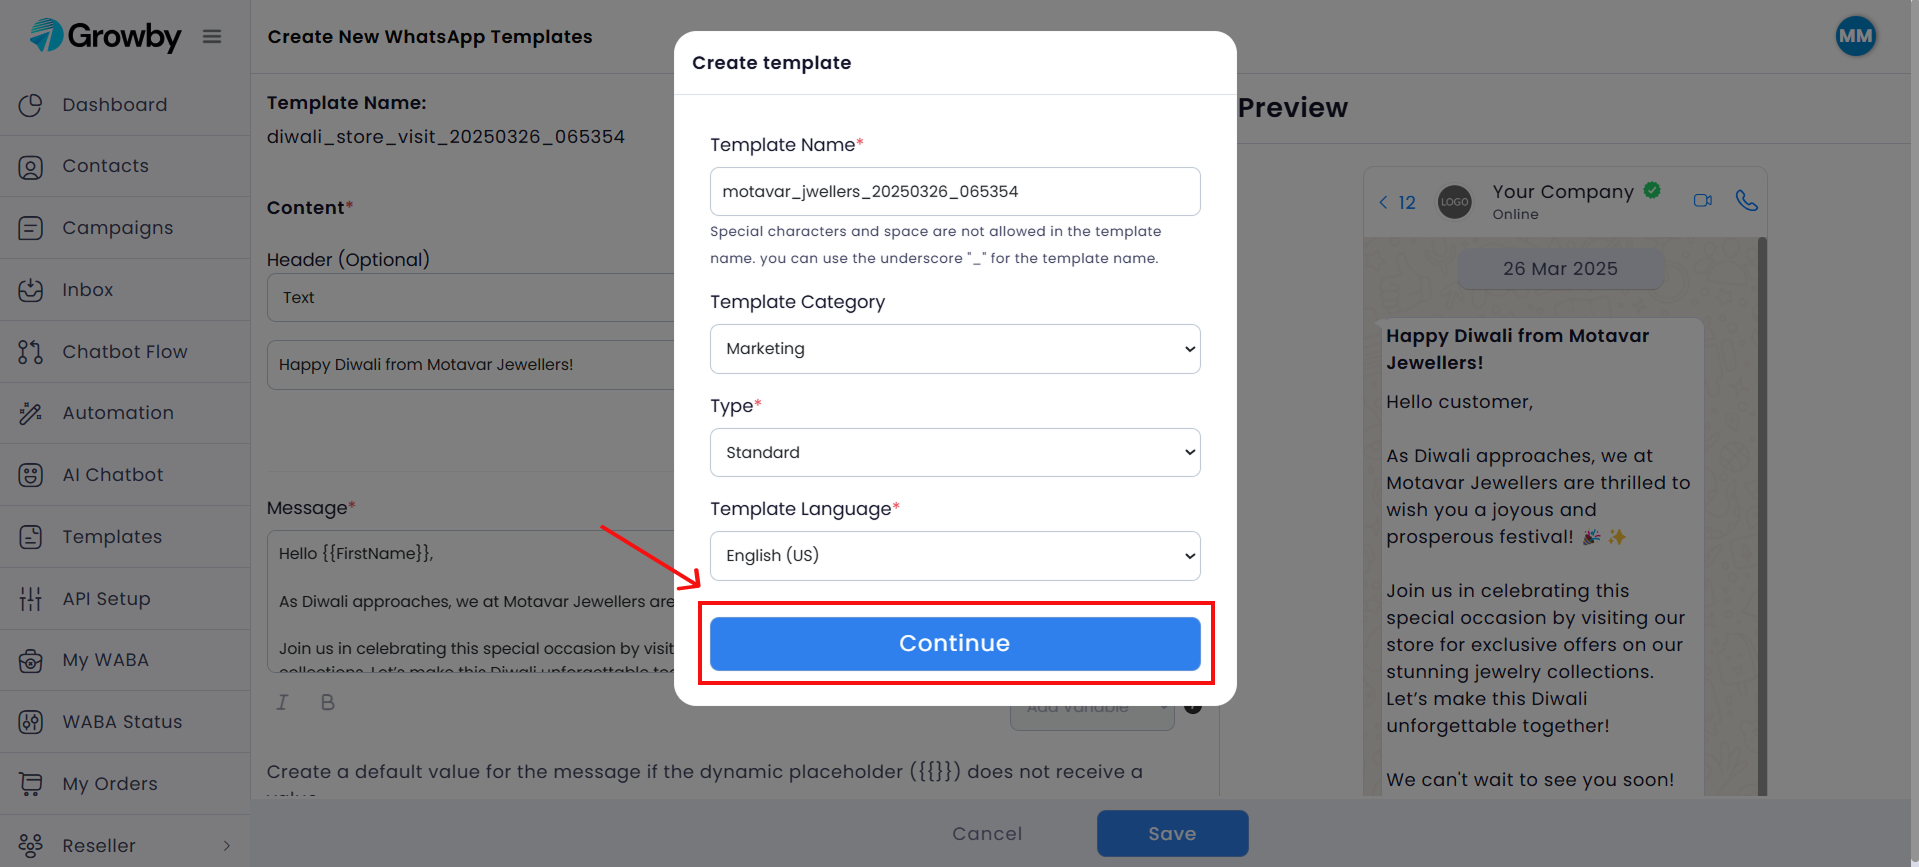
Step 7: Review Your Template Settings
After clicking Generate AI Powered Template, a pop-up will appear where you can review and modify the following:
-
Template Name: Name of your Template (Modify name if needed).
-
Template Category: Choose the appropriate category (Default: Marketing).
-
Template Type: Choose the template type (Default: Standard).
-
Template Language: Choose the language for the template (Default: English (US)).
Once confirmed, click on Continue button.
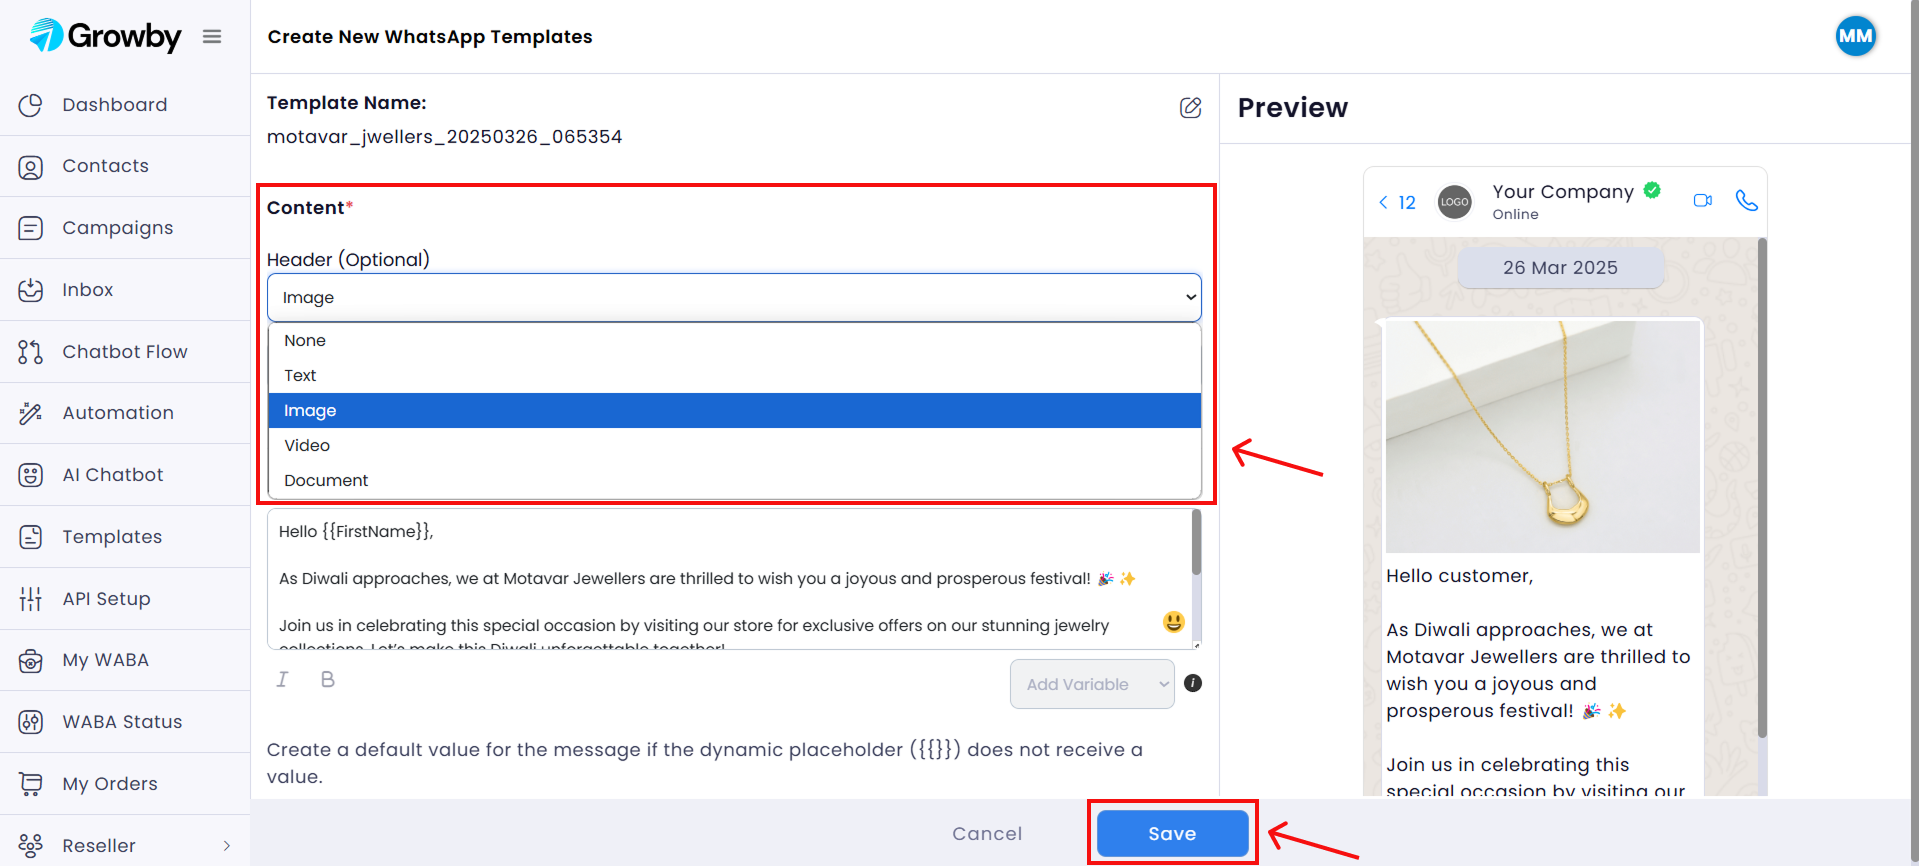
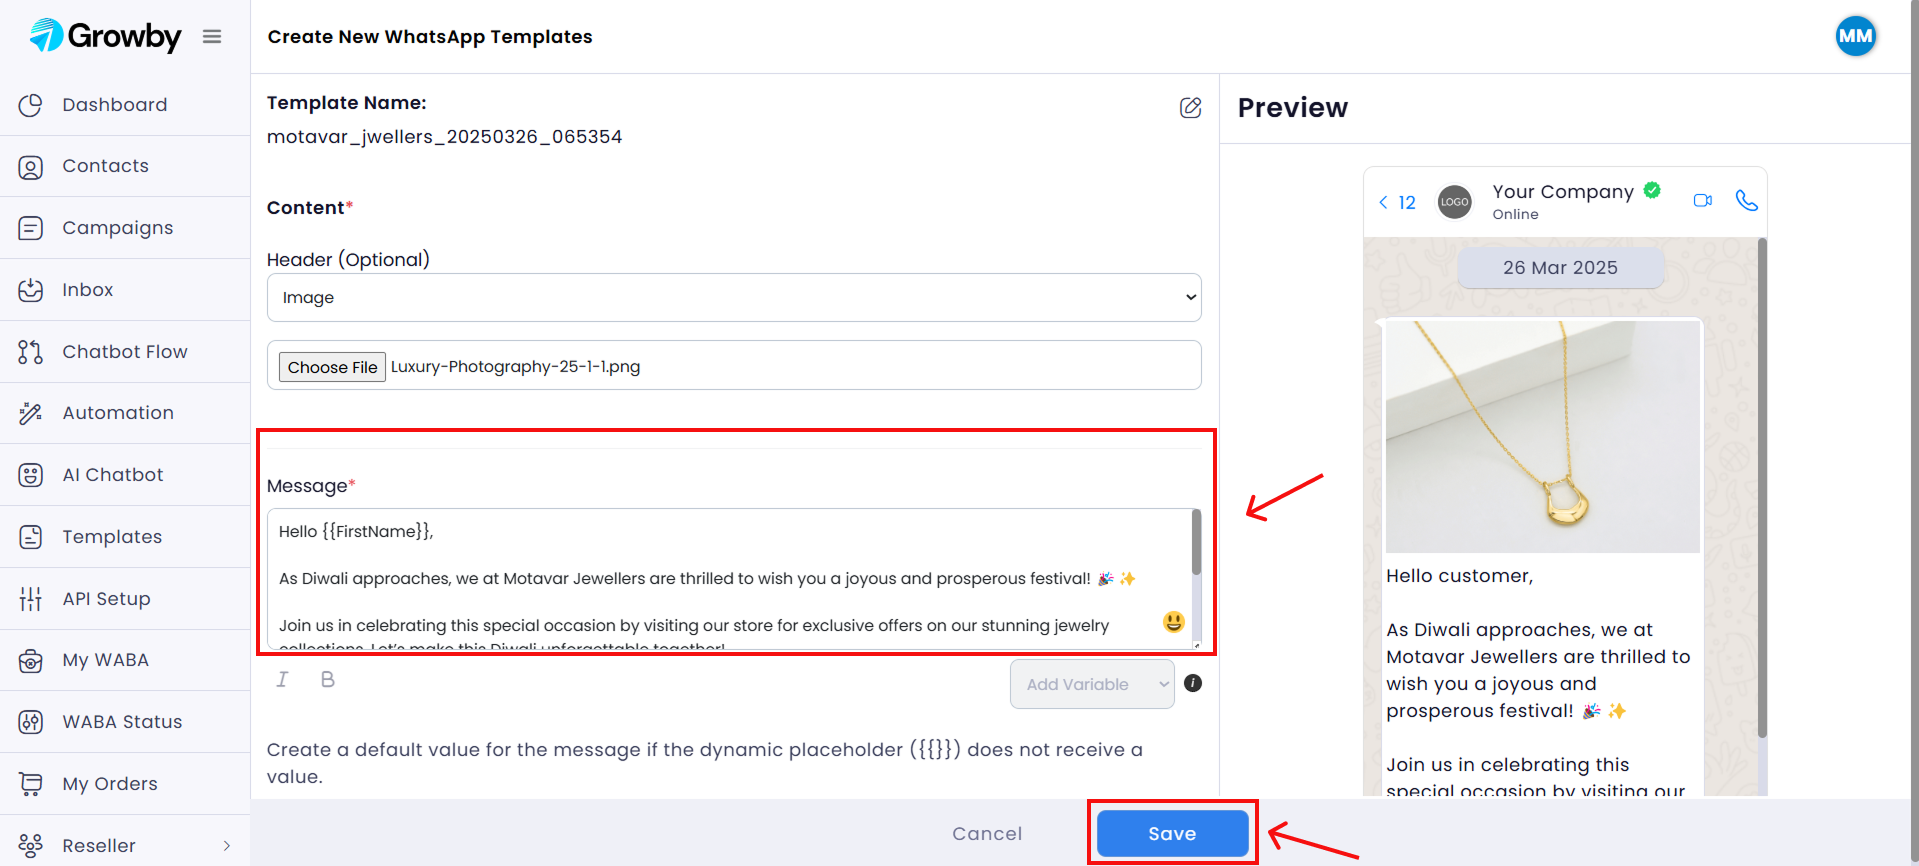
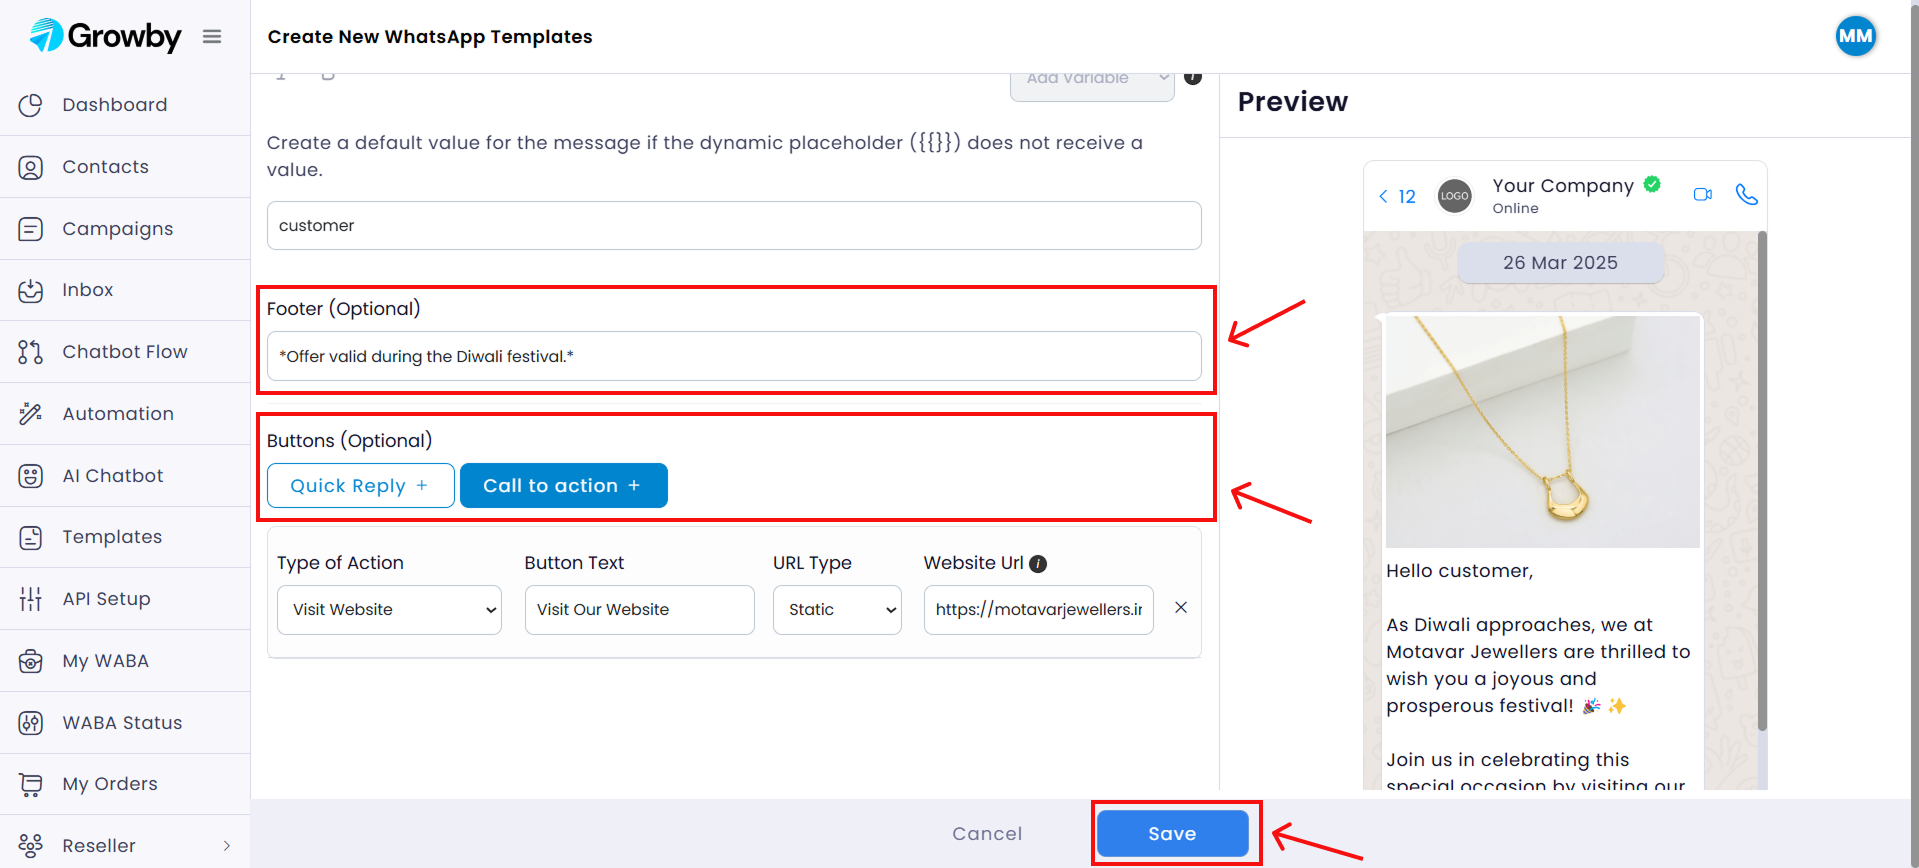
Step 8: Customize Template Elements
Here you will see the fields for Header, Message, Footer, and Buttons which can be customizable where Header, Footer and Buttons are optional.
Header: Choose one of the header type from the dropdown – None, Text, Image, Video, Document based on your requirement.
Message: Modify the message content, and apply bold or italic to one of the specific word.
Footer: Modify the footer content.
Buttons: Choose Quick Reply or Call to action button based on your requirement.
- Quick Reply: Adds predefined response buttons (e.g., “Yes” / “No”) for users to quickly reply.
- Call to action: Adds actions like Visit Website and Call Phone Number with the required details.
Once confirmed, click on Save button at the bottom.
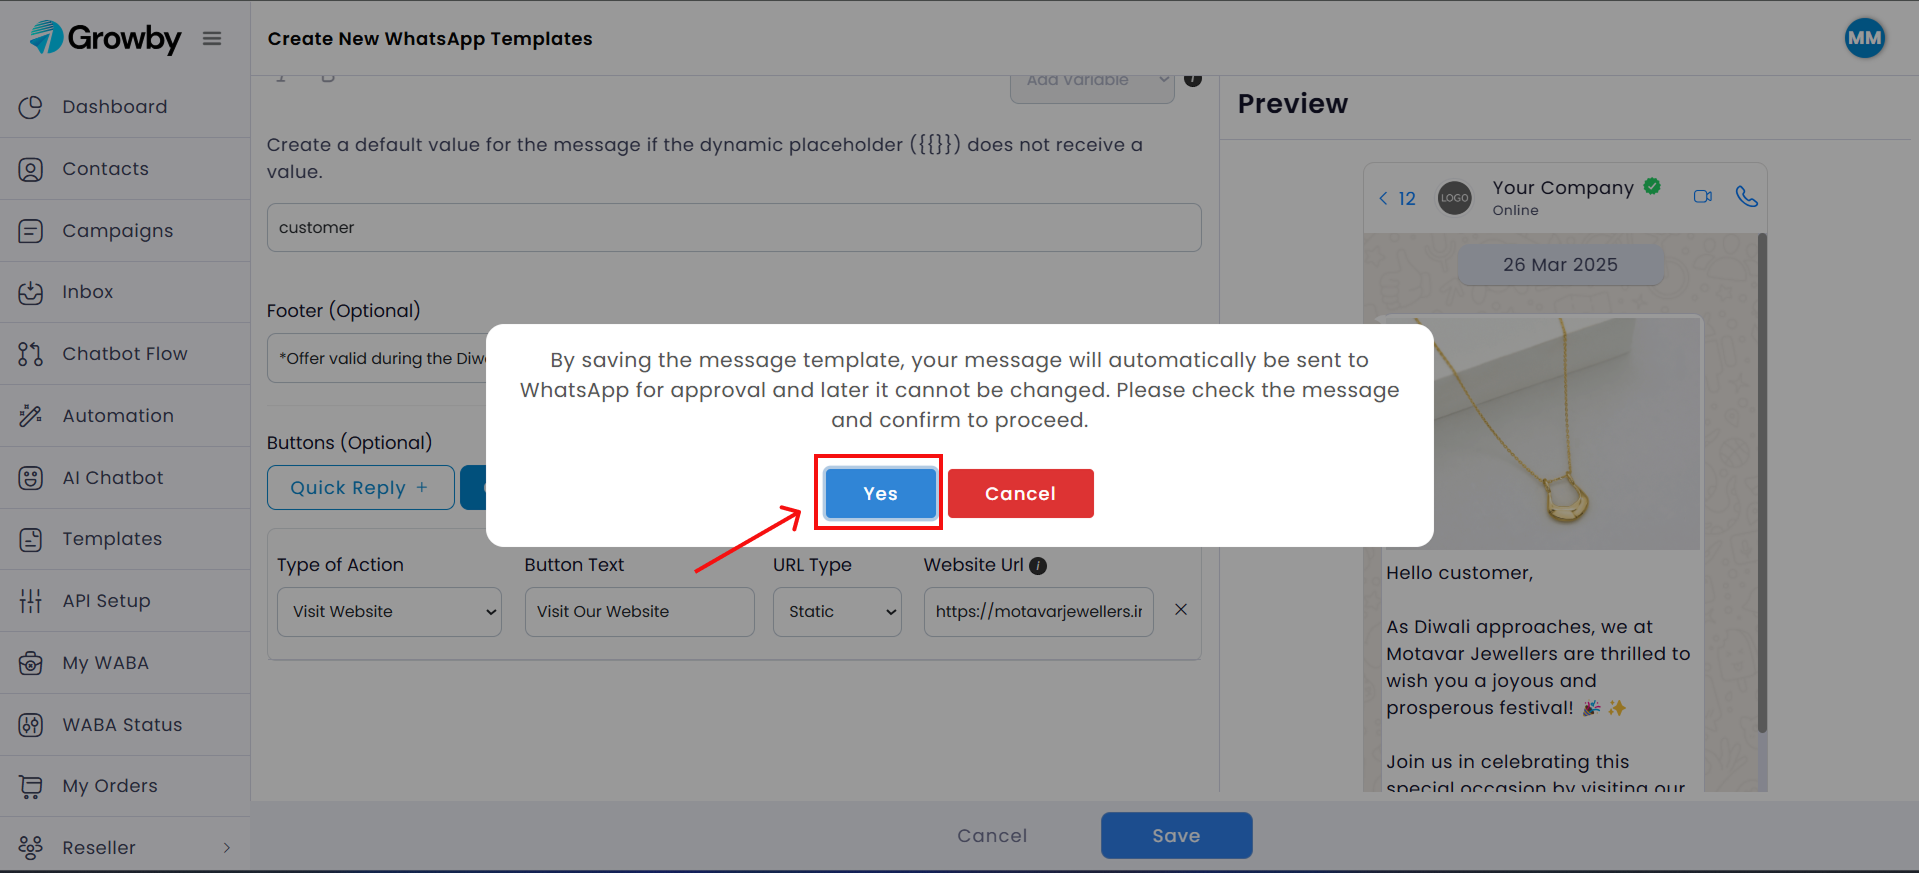
Step 9: Confirm and Save Template
After clicking on Save, a pop up of confirmation message will appear on the screen.
Click Yes to create your template.
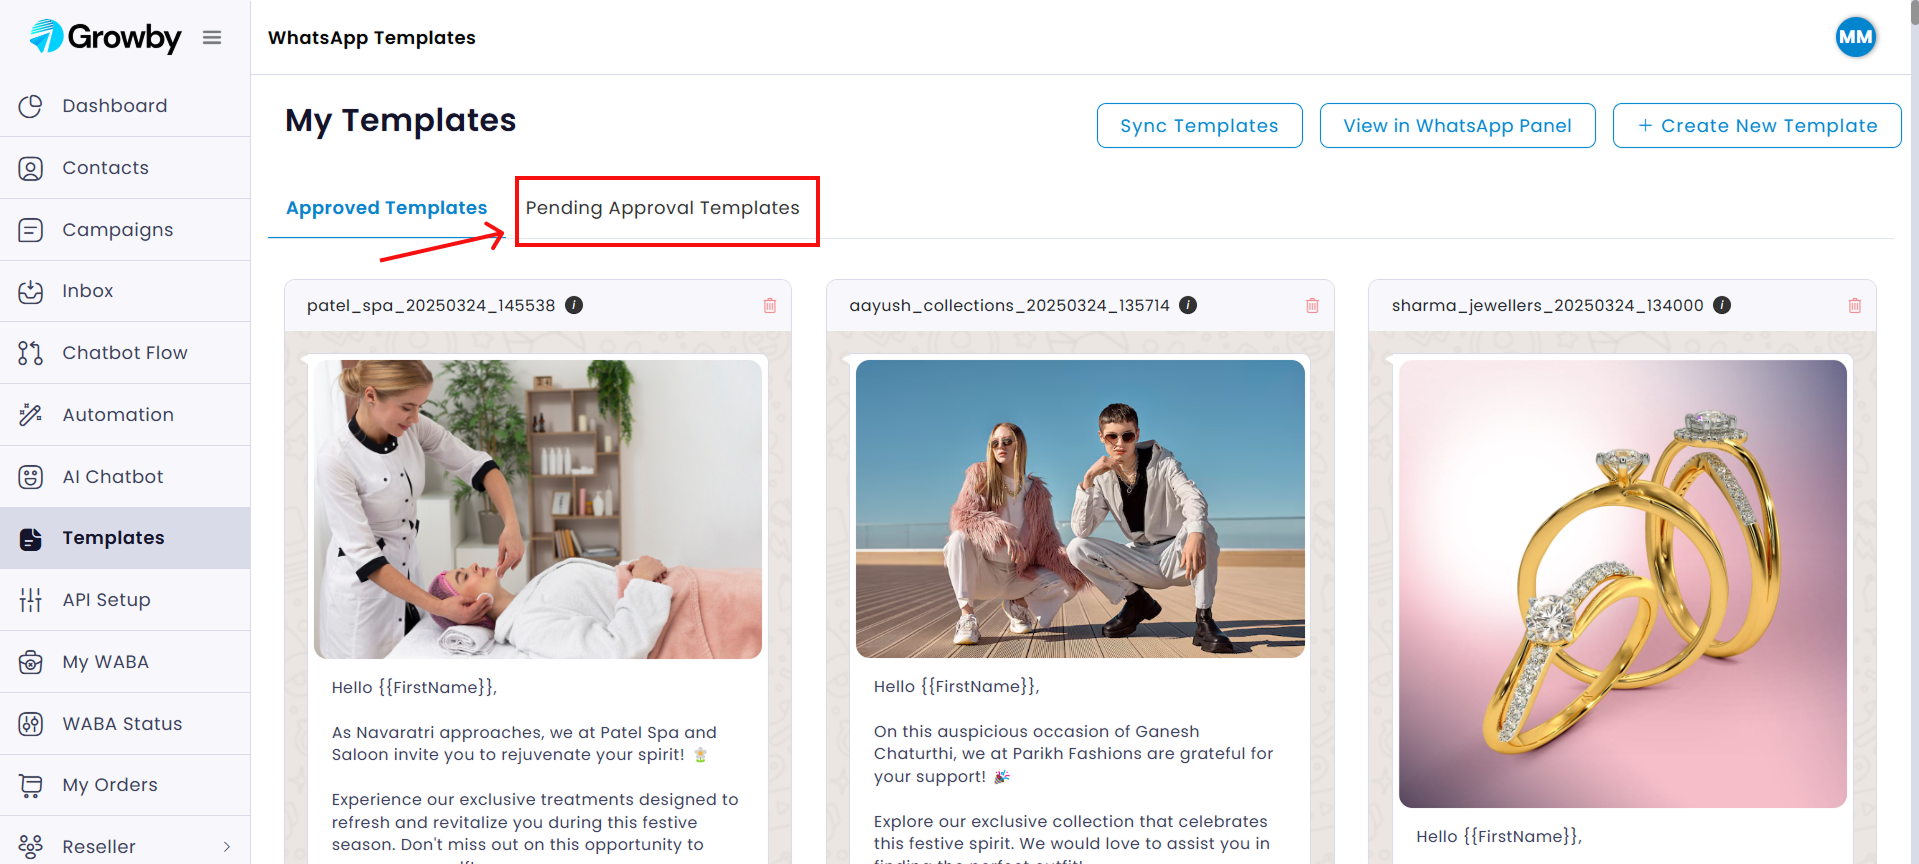
Step 10: Check Your Template Status
After clicking Yes, you will be redirected to the My Template page where your created templates are displayed.
Click on the Pending Approval Templates to see your template status from the meta.
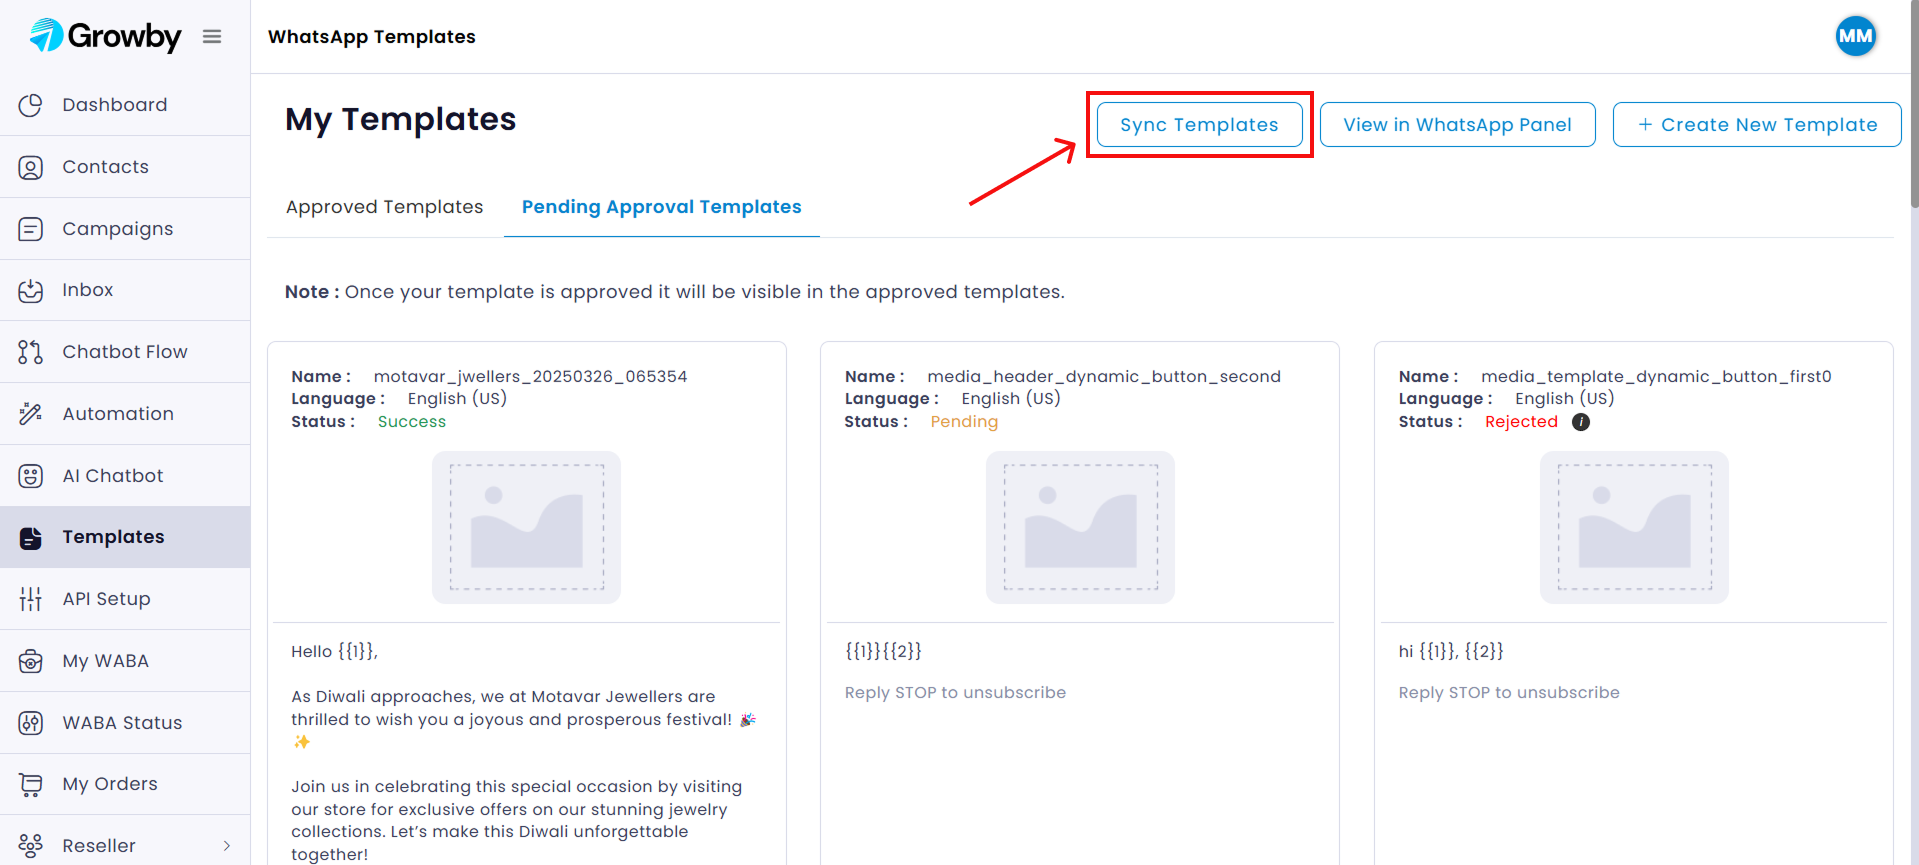
Step 11: Sync Your Template
After reaching the Pending Approval Templates section, if your template status shows Pending or Success, click the Sync Templates button.
If your template status shows Failed or Rejected by Meta, follow the same steps to create a new template.
When you click the Sync Templates button, a pop-up will appear confirming the sync process.
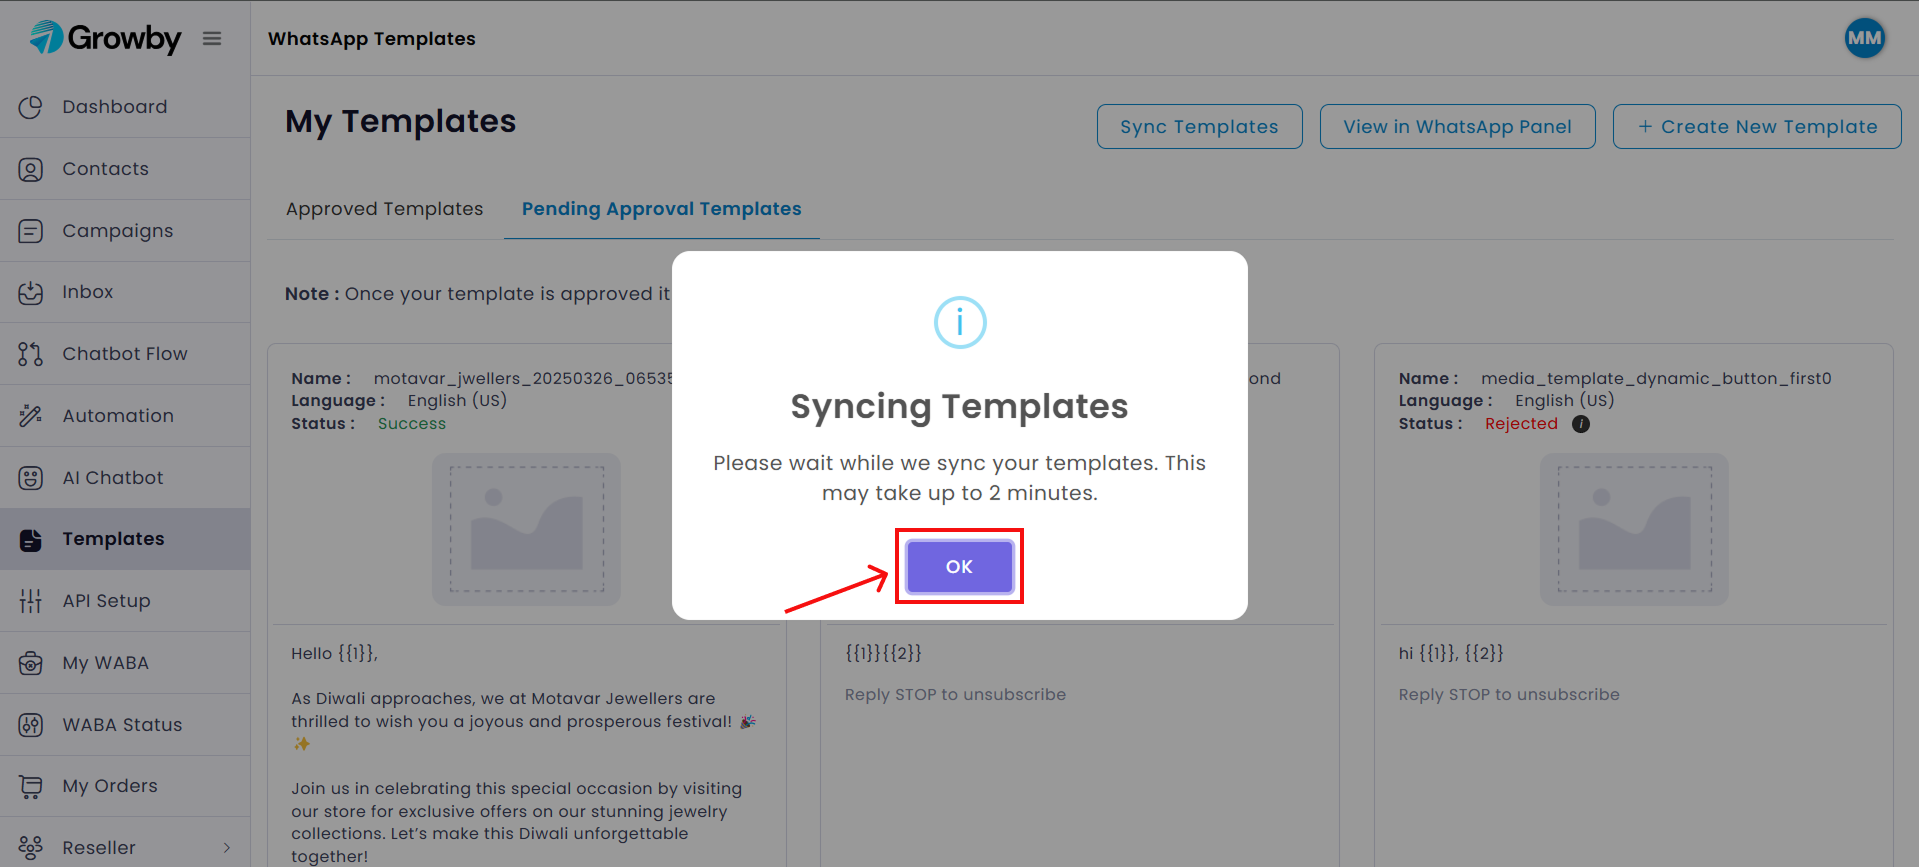
Step 12: Confirm Sync Process
Click OK to proceed and sync your templates.
Step 13: View Approved Template
After clicking OK, you will be redirected to the My Templates page. Once your template is approved by Meta, it will move to the Approved Templates section.
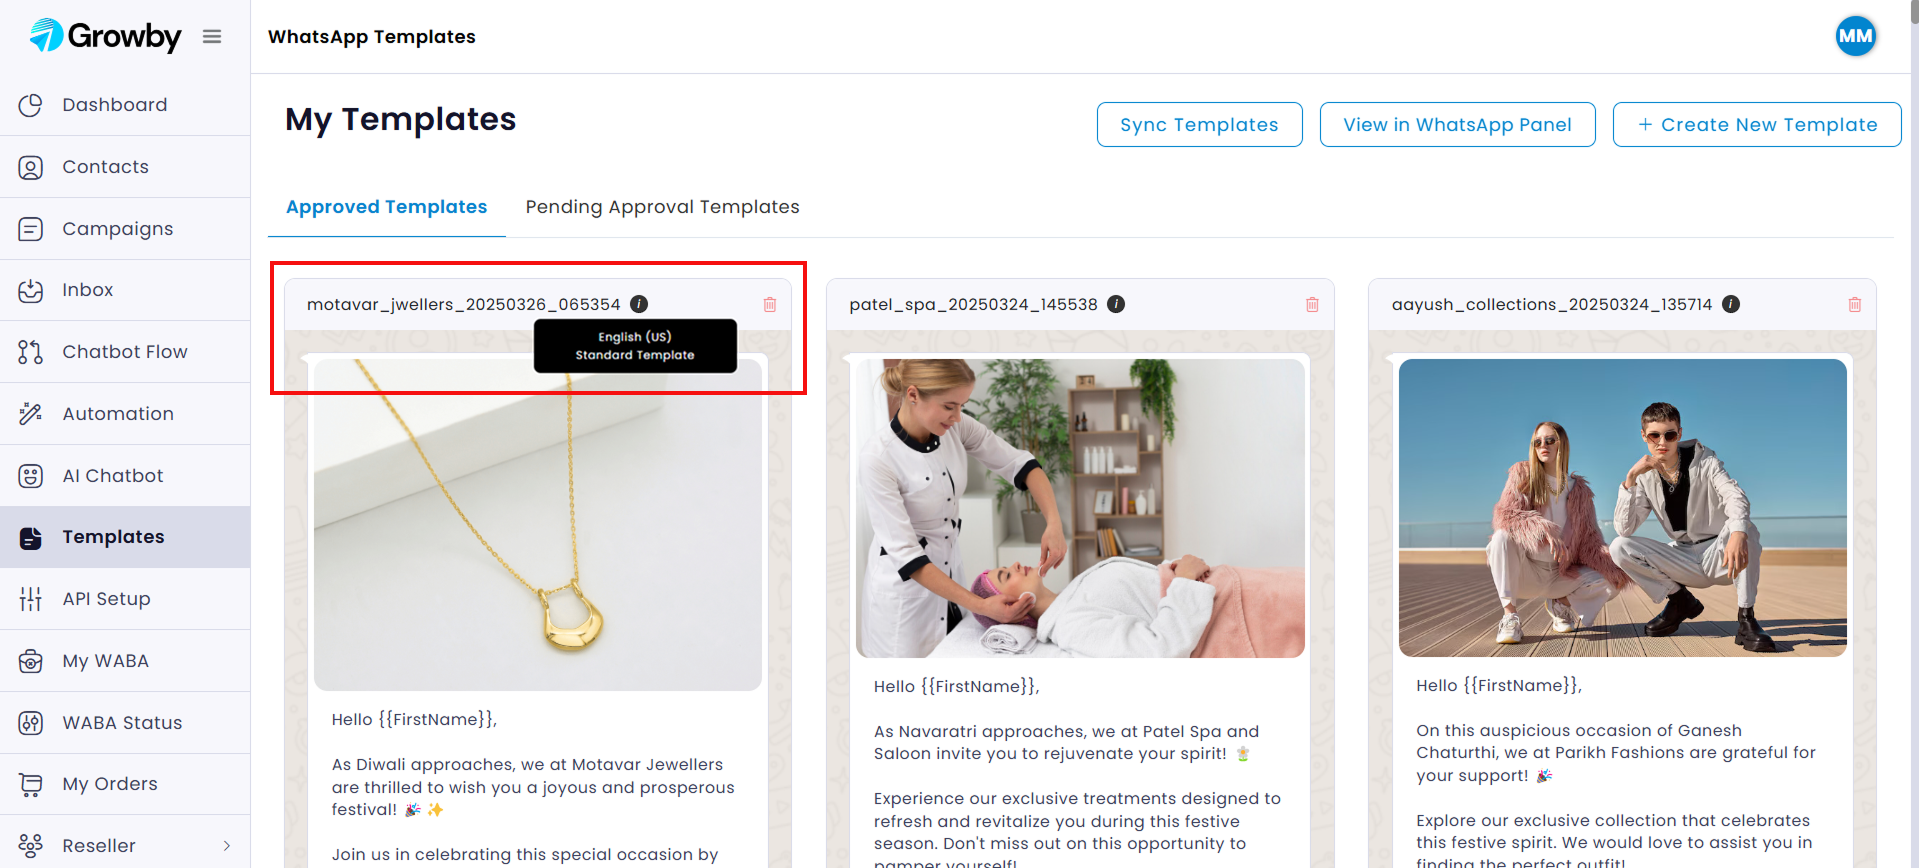
You can view the Template Language and Template Type by hovering over the tooltip icon.
Now, your created templates are available for further use.